Ragic offers various Website Plug-ins that allow you to embed sheets on your website or share them as a separate link with others. You could embed forms to your website that will be stored in your database once they are submitted, provide access to your customers and clients to search your database, or even view your entire database.
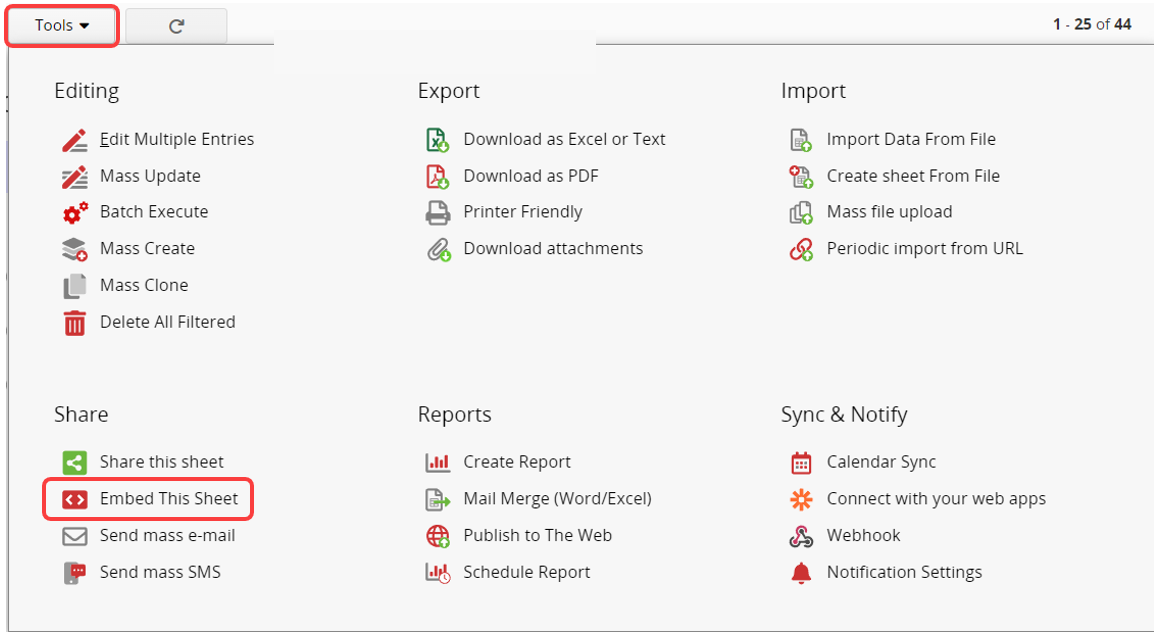
Go to the sheet you want to embed and click Embed This Sheet under the Share section in the Tools menu.
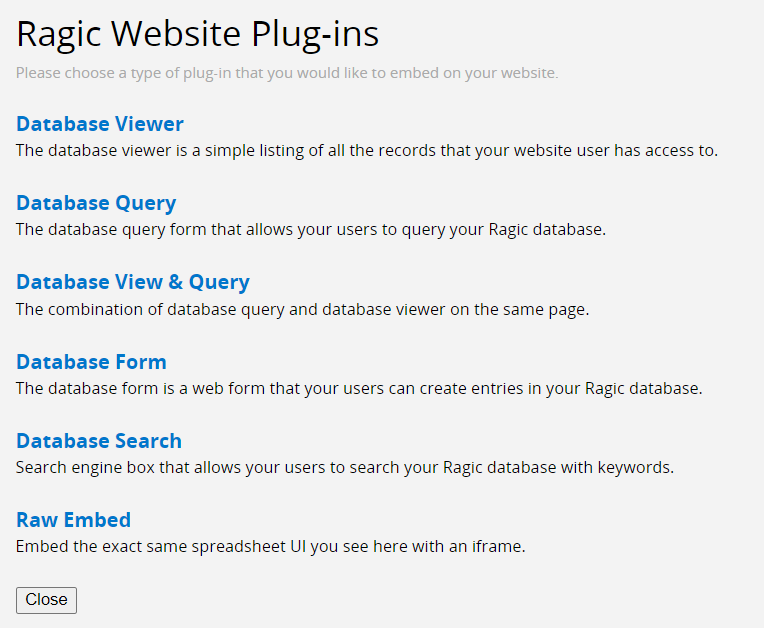
You can choose from six types of plug-ins.
Each plug-in has its own configuration interface.
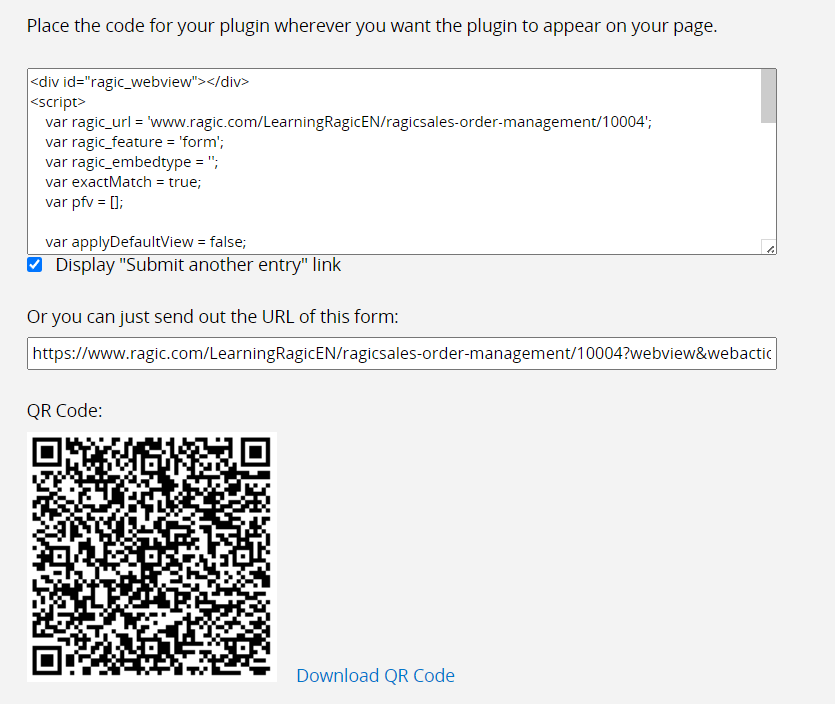
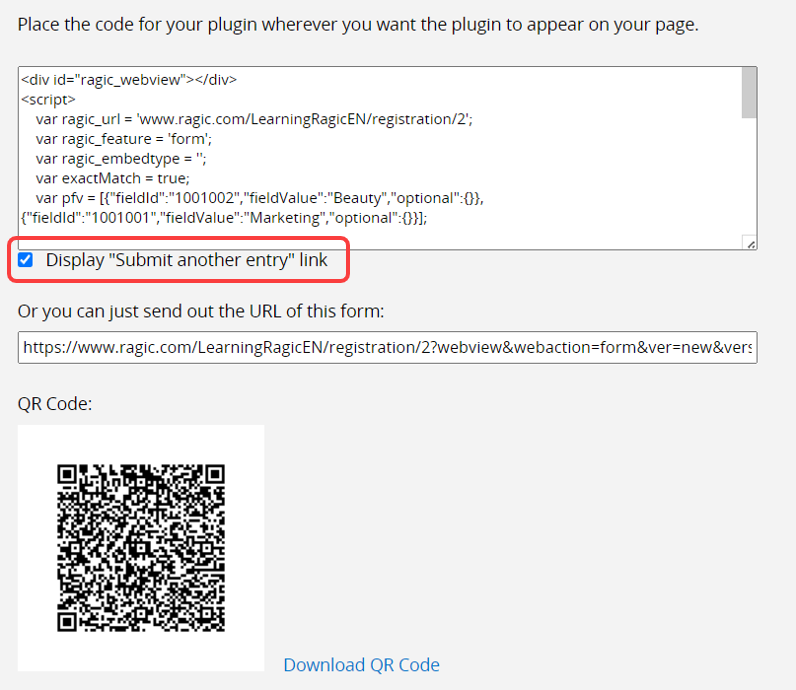
After configuration, an HTML code snippet will be provided. You can paste this code into the website where you want to embed the sheet. Alternatively, you can share the direct link or QR code to access the embedded sheet.
Ragic also supports embedding in WordPress.
You can choose the type of website plug-in based on your needs. The table below provides an overview of each type:
| Name | Purpose |
|---|---|
| 1. Database Viewer | A simple listing of all the records in your sheet that your website users can access. |
| 2. Database Query | A database query sheet allows users to query your Ragic database. |
| 3. Database View & Query | A database query sheet allows users to query your Ragic database and view the results on the same page. |
| 4. Database Form | A blank web sheet allows users to submit data, which will be saved as a record in your database. |
| 5. Database Search | A search engine box allows users to search your Ragic database with keywords. |
| 6. Raw Embed | Embed the same spreadsheet UI you see here using an iframe. |
Once you choose the type of website plug-in, you can also Add Custom CSS and apply it to either "All Sheets" or "This Sheet".
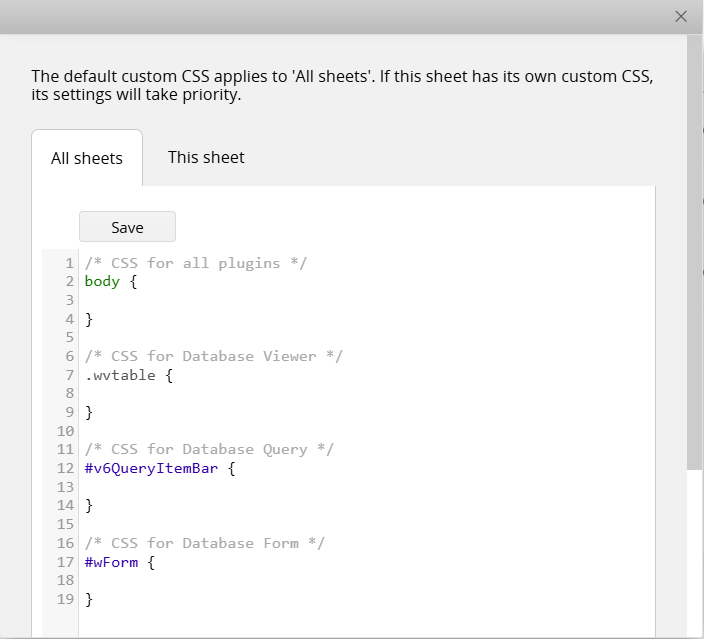
Note: The default custom CSS applies to "All sheets". If "this sheet" has its own custom CSS, its settings will take priority.
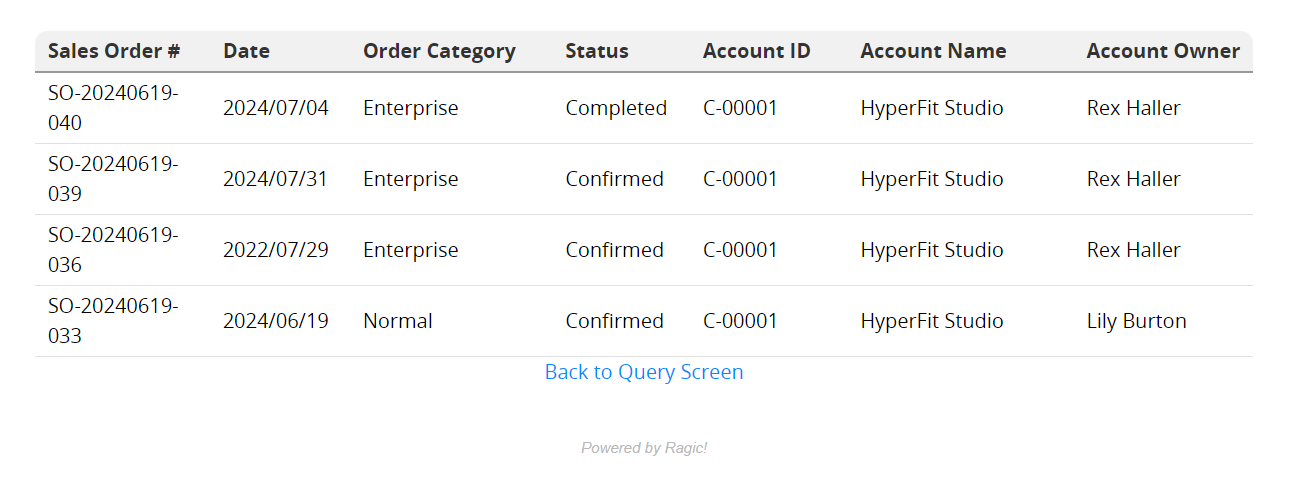
The Database Viewer allows website users to view all the records within the sheet to which they have Access Rights. You can also make the entire database public if needed.
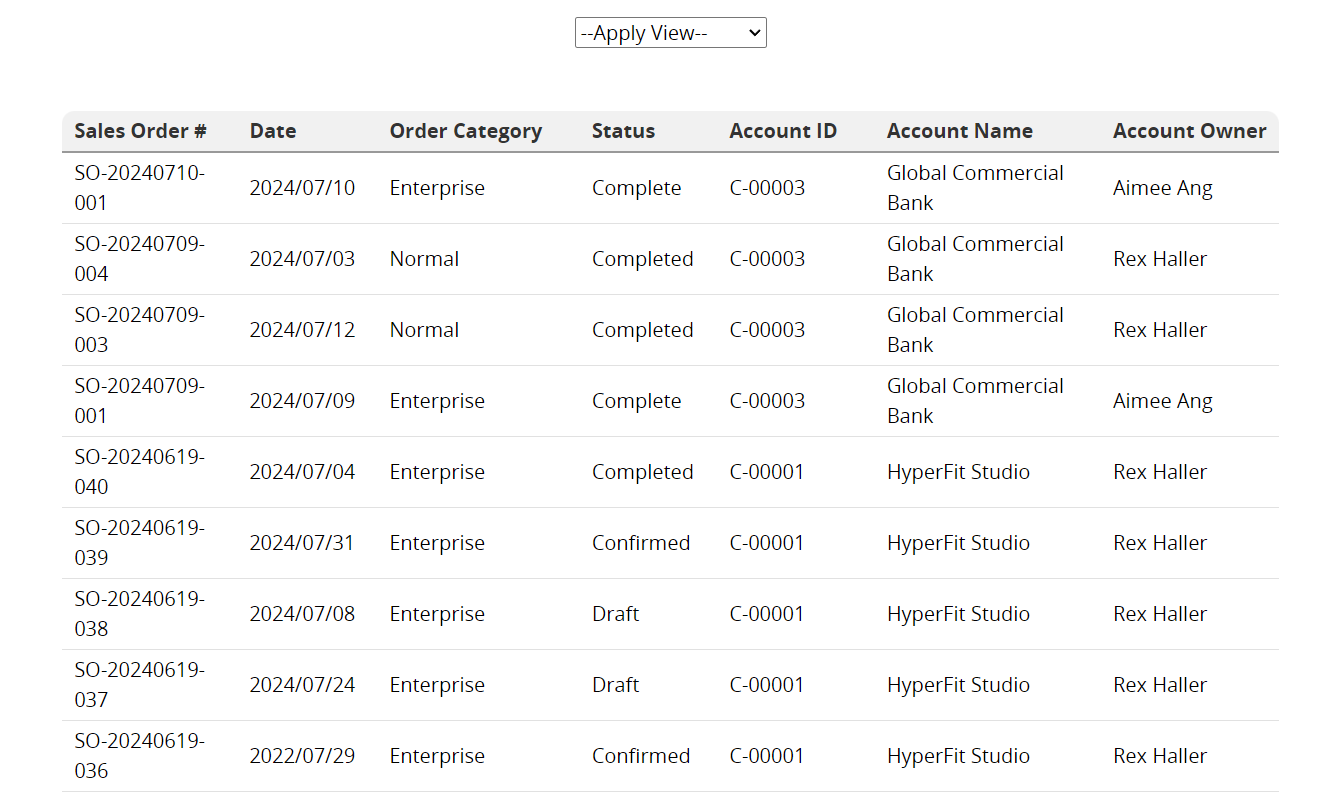
Users can click on a record within the page to view more detailed information, just as they would on the Listing Page or Form Page.

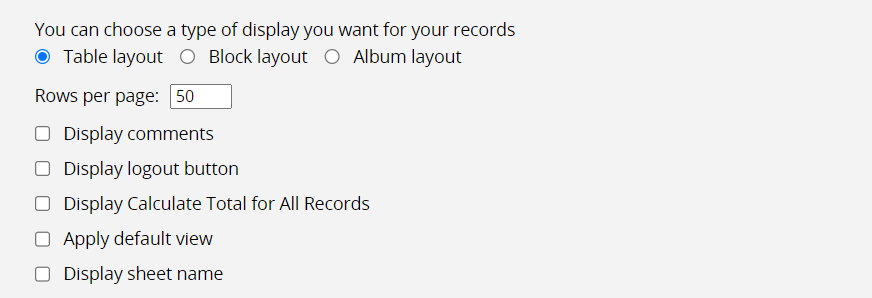
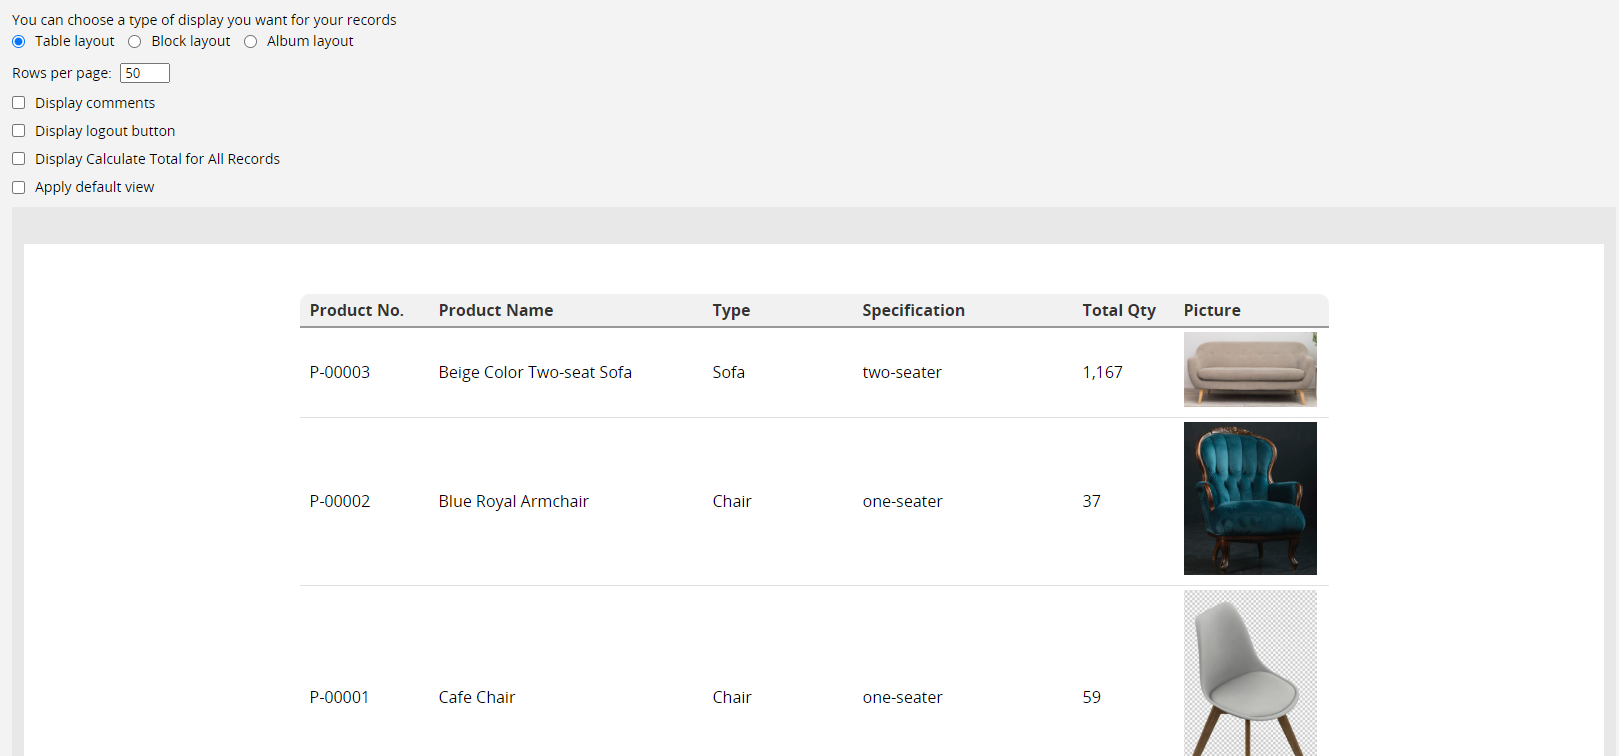
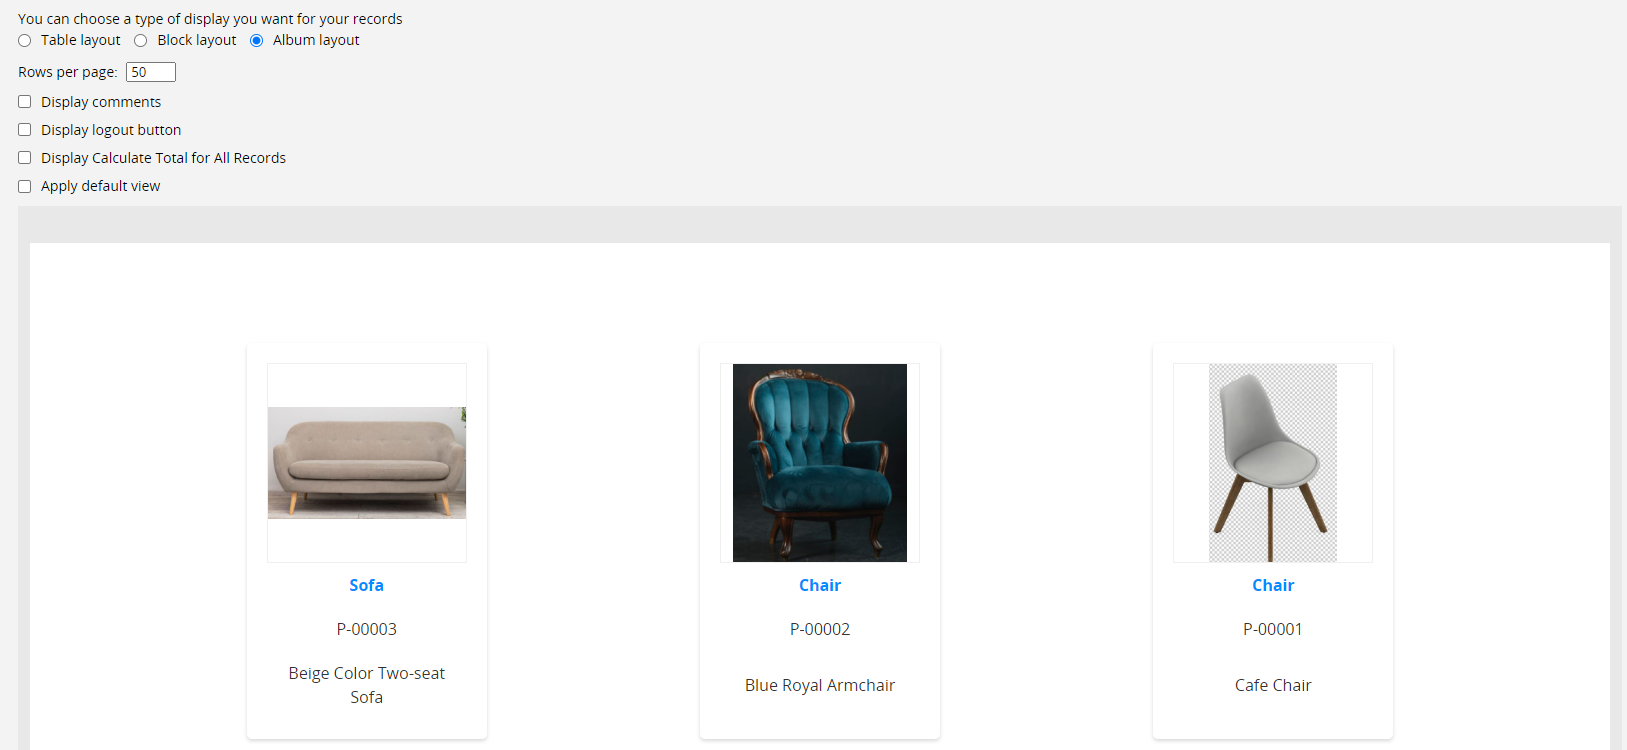
There are three layouts available.
The Table layout: Records are displayed in a format similar to the Listing Page.
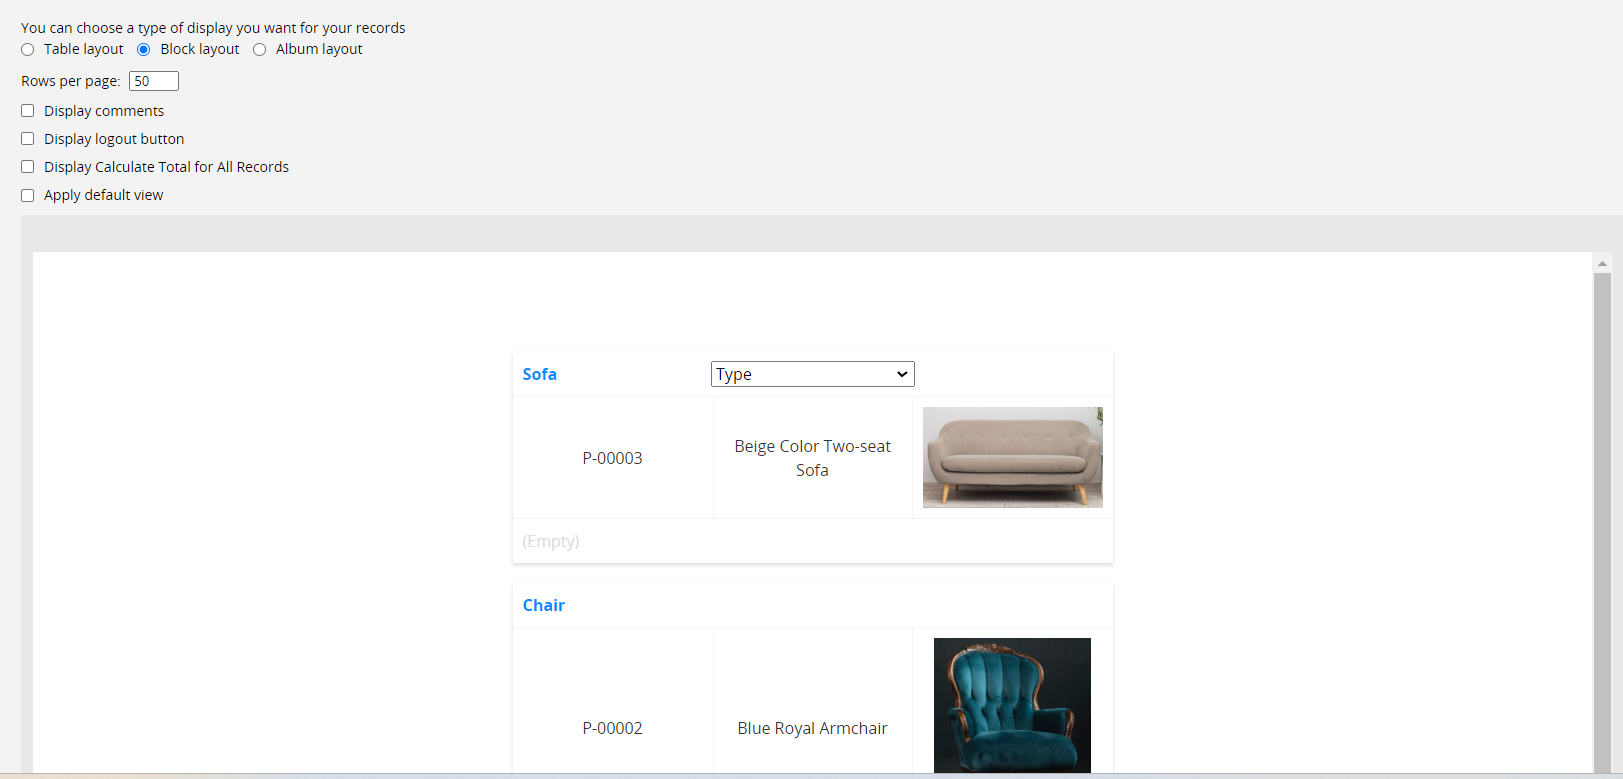
The Block layout: Records are displayed row by row according to the selected fields. Hovering over the text reveals its source field. Use the dropdown menu below to change the corresponding field.
The Album layout: This layout displays images as thumbnails, with records arranged in a grid. Similar to the Block layout, hovering over the text allows you to change the corresponding field for that text.
| Setting | Description |
|---|---|
| Rows per page | Set the number of records displayed per page. |
| Display comments | Whether to display comments in the records. |
| Display logout button | Whether to display a logout button. |
| Display Calculate Total for All Records | Whether to display a total calculation bar for the record. |
| Apply default view | Whether to apply the default view set for the sheet. |
| Display sheet name | Whether to display a the sheet name. |
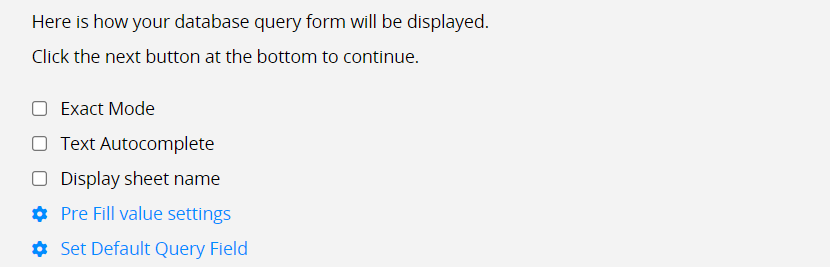
The Database Query allows users to search for records based on the field criteria you set. You can also enable Exact Mode or Text Autocomplete if needed.
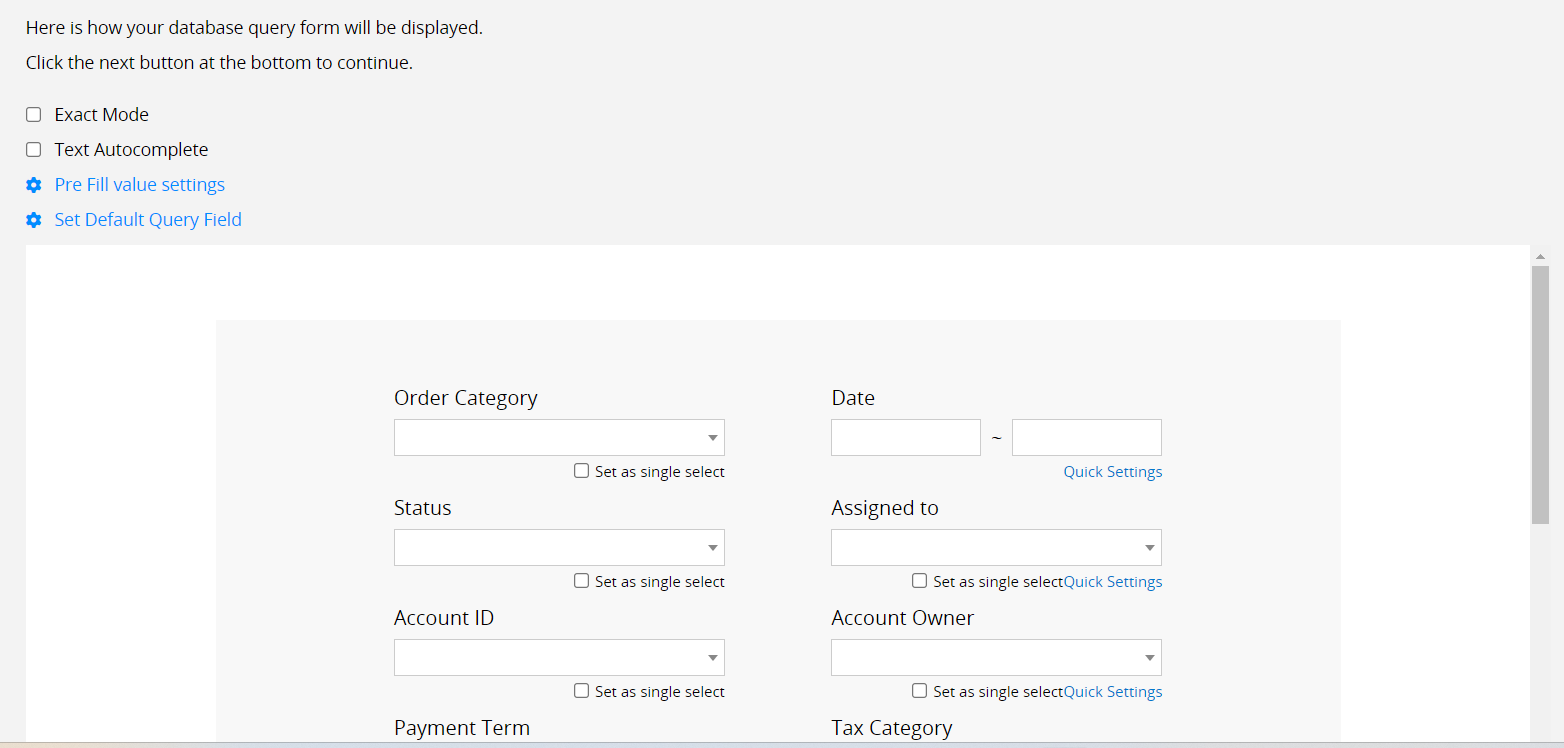
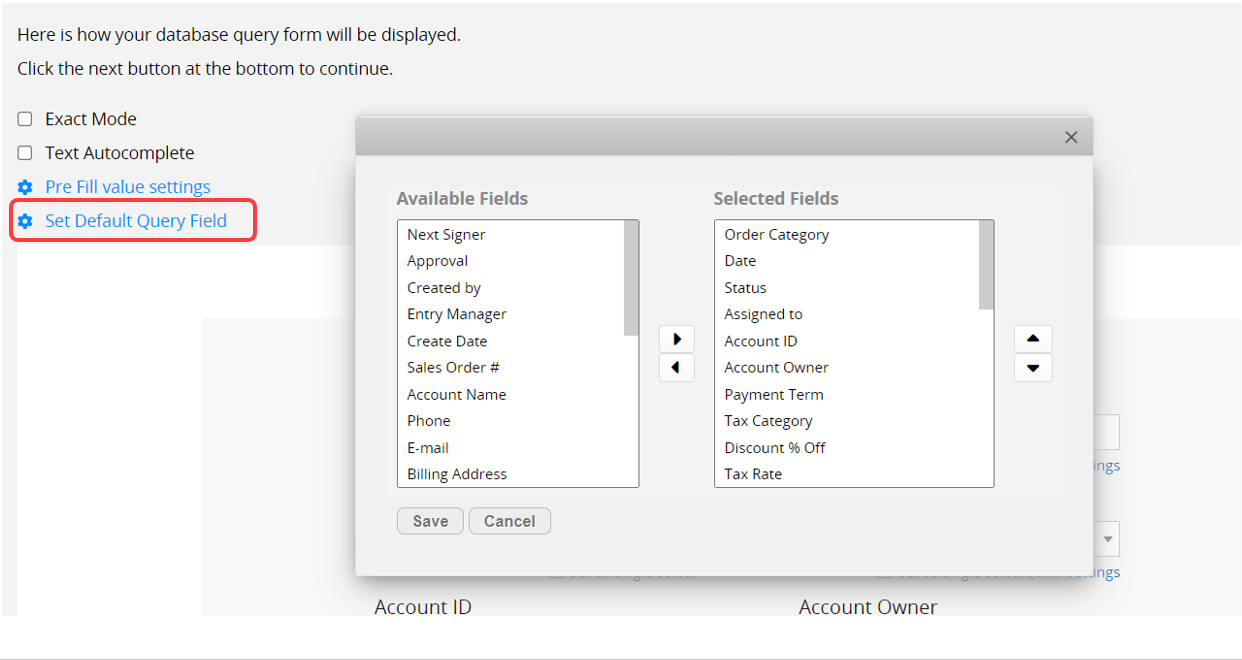
Click Set Default Query Field to modify which fields are available for querying and their order.
The Field Types for query fields will match those on the Form Page. For example, Selection fields will appear as dropdown lists on the query page.
After submitting the query criteria, matching records will be displayed according to the Database Viewer Layout Type you set in the next step, and users can click on the records to view more detailed information.
| Setting | Description |
|---|---|
| Exact Mode | This allows users to find records with exact match criteria even when your sheet is not public. For detailed information and use cases, you can refer to this article. |
| Text Autocomplete | Whether to enable text autocomplete when entering search criteria. |
| Display sheet name | Whether to display a the sheet name. |
| Pre fill value settings | Refer to this section for details. |
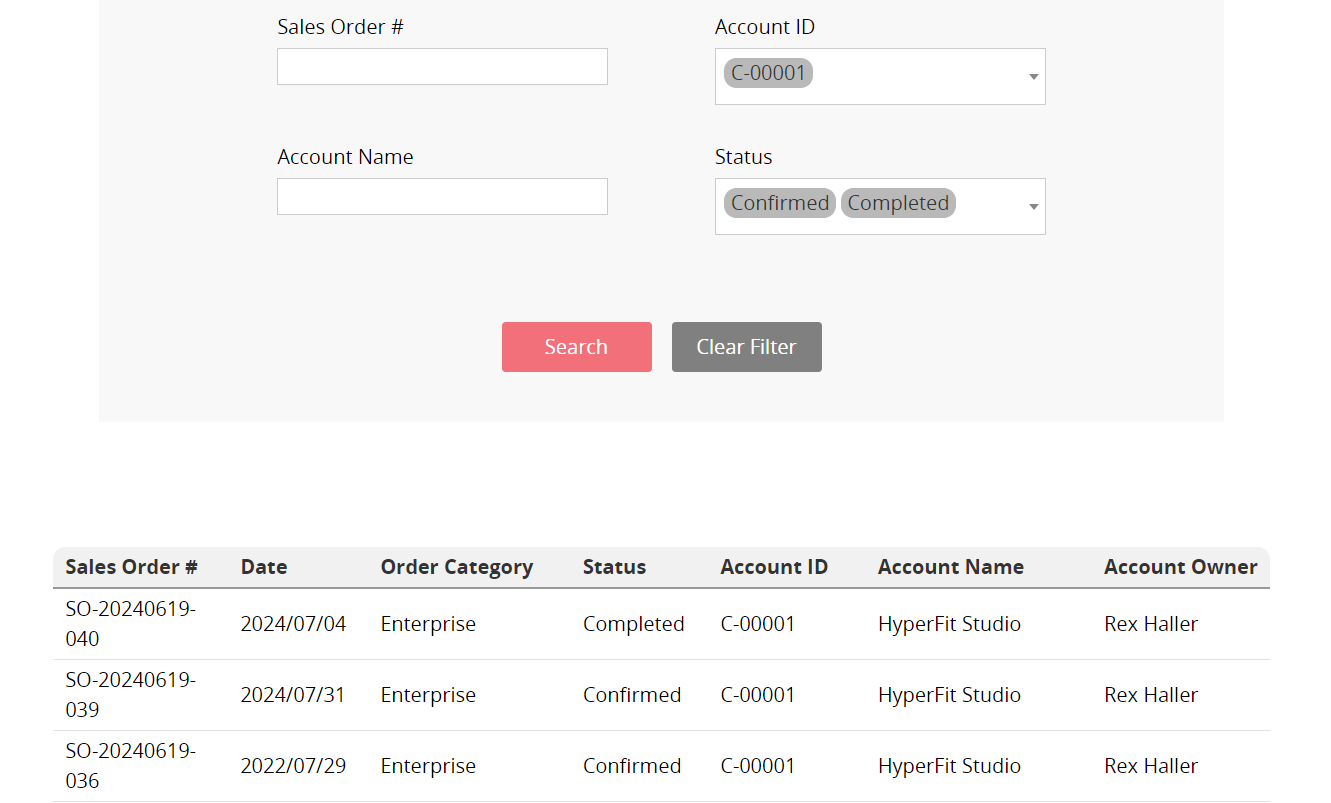
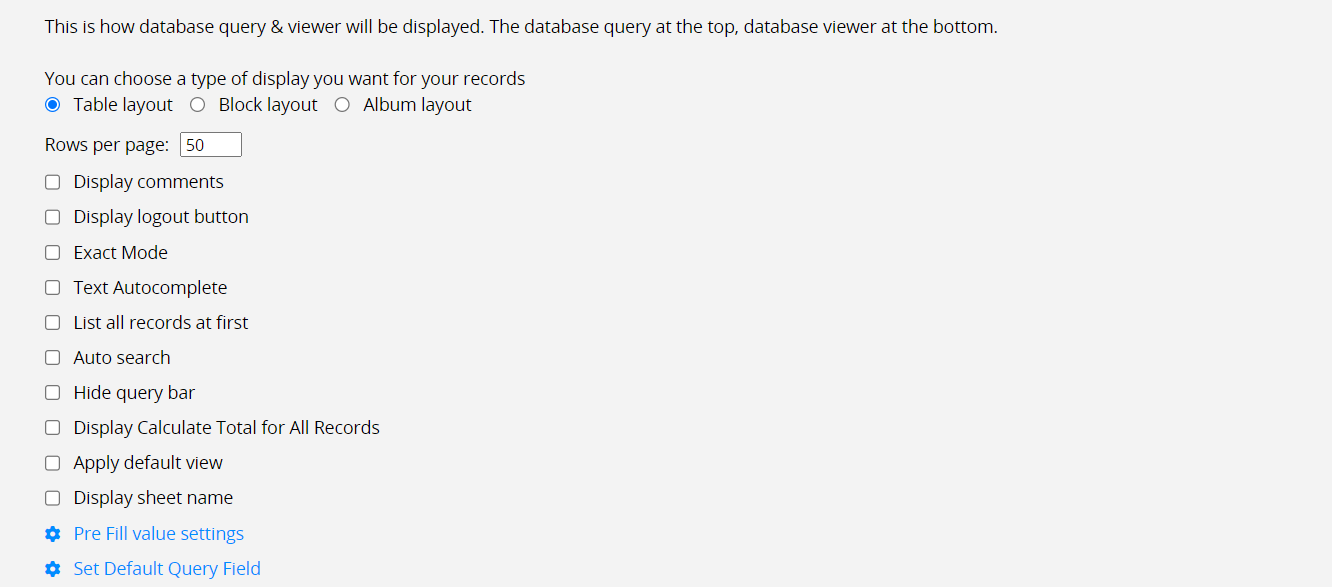
This plug-in combines the Database Query and Database Viewer. Unlike the Database Query, which takes you to a search results page after querying, the Database View & Query displays the results on the same page. Users input their search criteria at the top, and the matching results are shown directly below.
| Setting | Description |
|---|---|
| Layout types | Refer to this section for details. |
| Rows per page | Set the number of records displayed per page. |
| Display comments | Whether to display comments in the records. |
| Display logout button | Whether to display a logout button. |
| Exact Mode | Refer to this section for details. |
| Text Autocomplete | Whether to enable text autocomplete when entering search criteria. |
| List all records at first | Whether to display all accessible records before searching. |
| Auto search | Enable to automatically use pre fill values as query criteria and display the corresponding results when the page opens. |
| Hide query bar | Whether to hide the query bar at the top. |
| Display Calculate Total for All Records | Whether to display a total calculation bar for the record. |
| Apply default view | Whether to apply the default view set for the sheet. |
| Display sheet name | Whether to display a the sheet name. |
| Pre fill value settings | Refer to this section for details. |
You can embed a form to allow users to fill out surveys or provide feedback. Once users complete and submit the form, the data will be stored in your database.
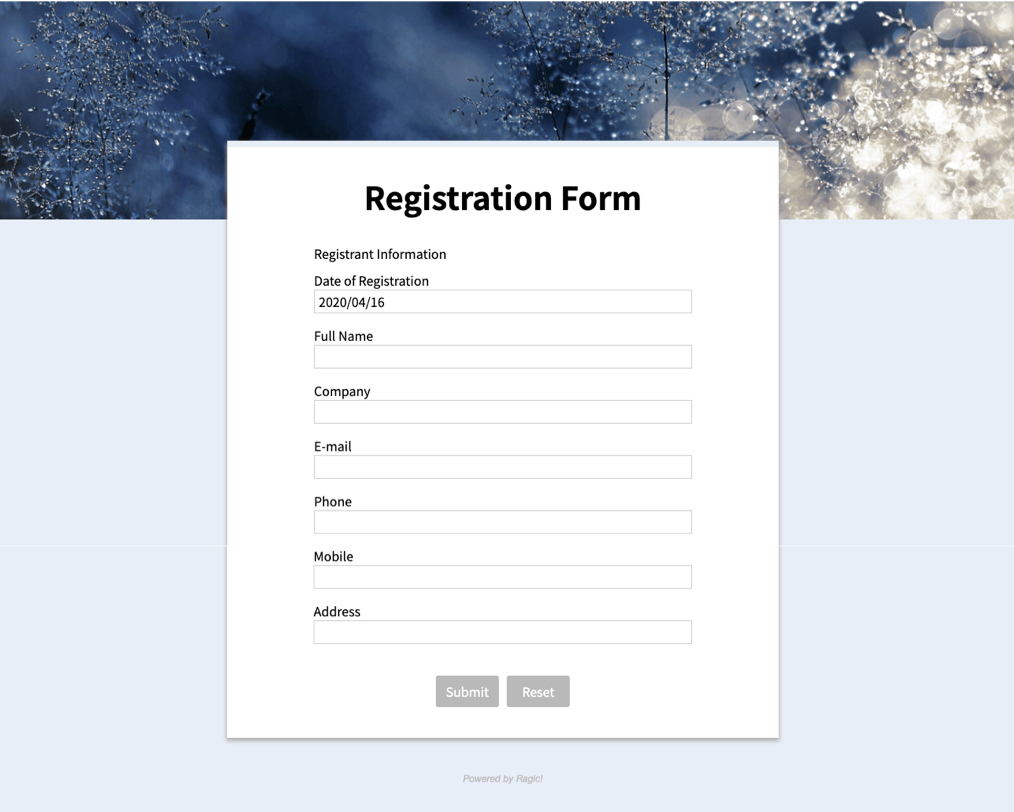
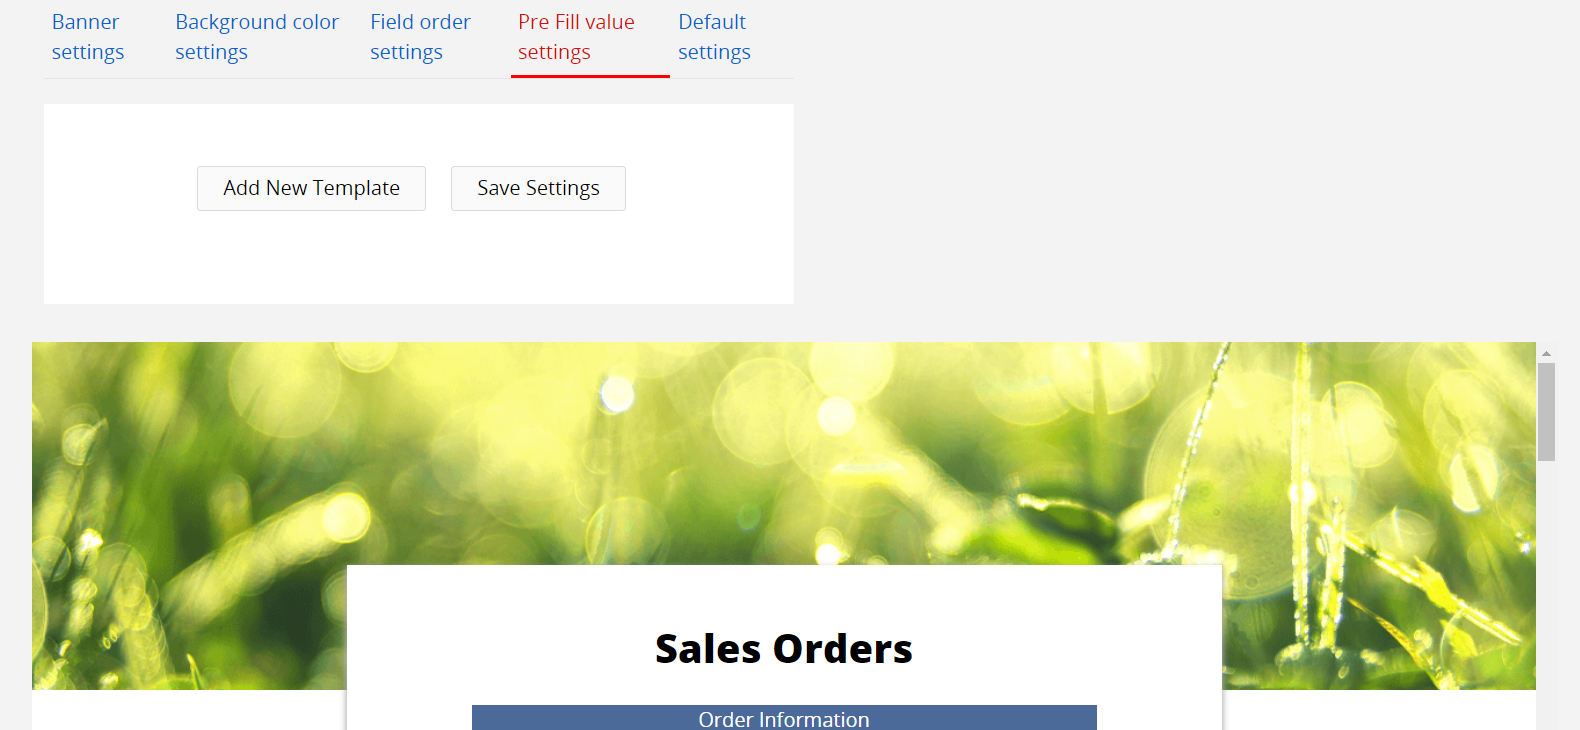
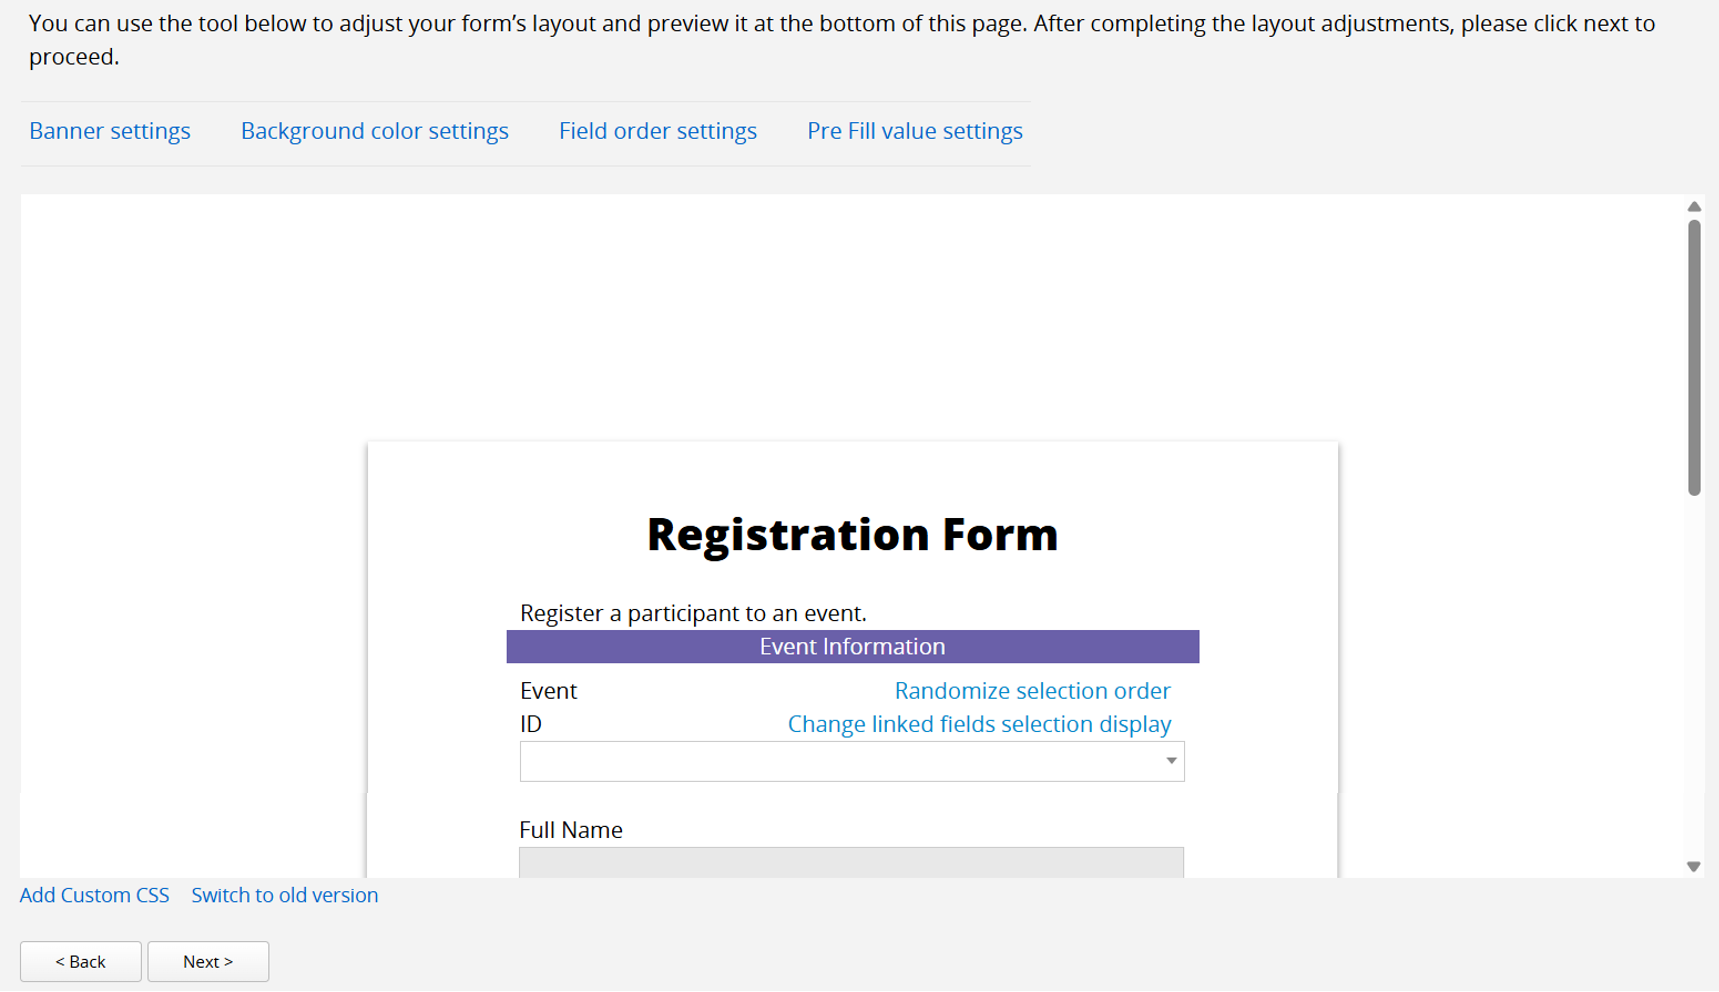
After selecting Database Form, you can preview and configure the layout of your form. Click on the top block to adjust the appearance of the embedded form, including the banner, theme color, and field arrangement. If needed, you can also switch to the old version. For more information on the differences between the old and new versions, please refer to this document.
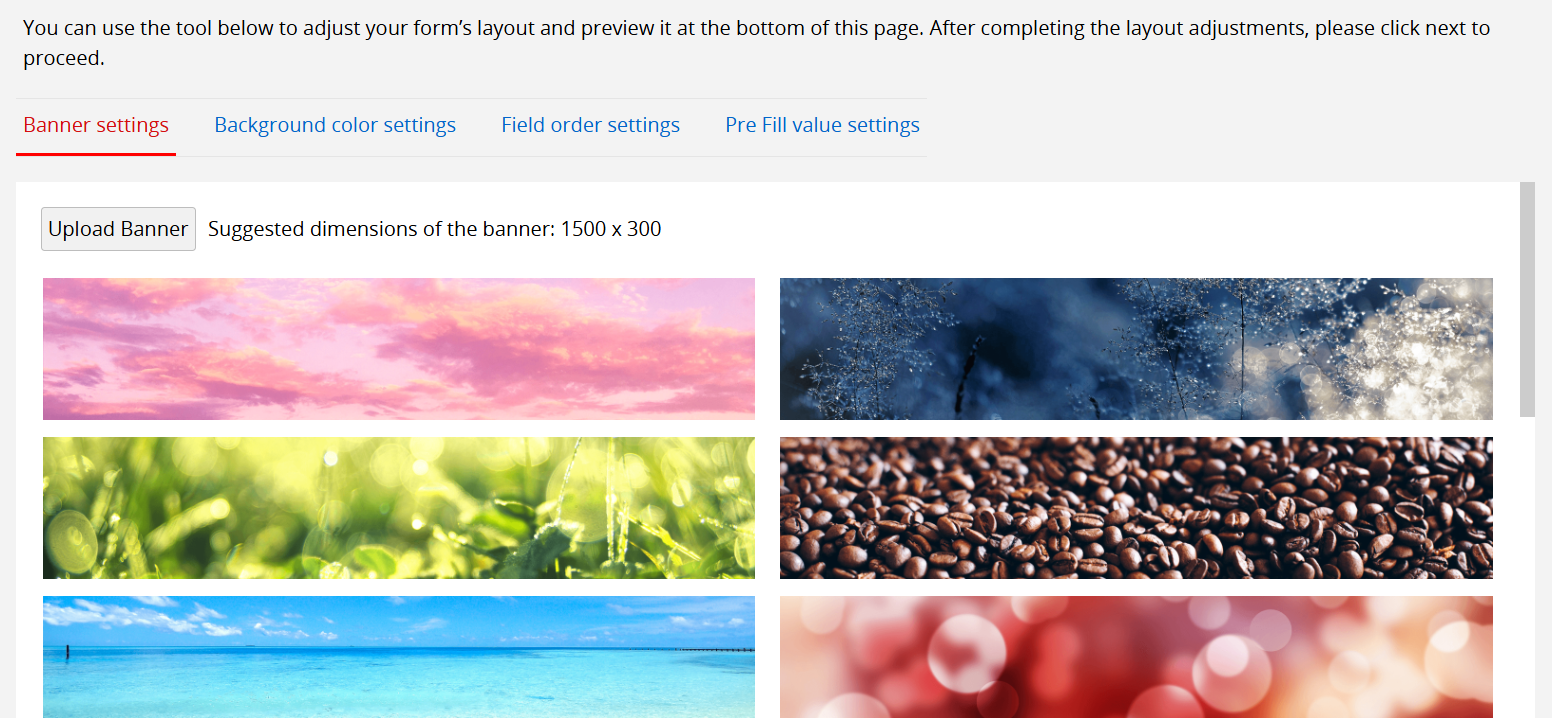
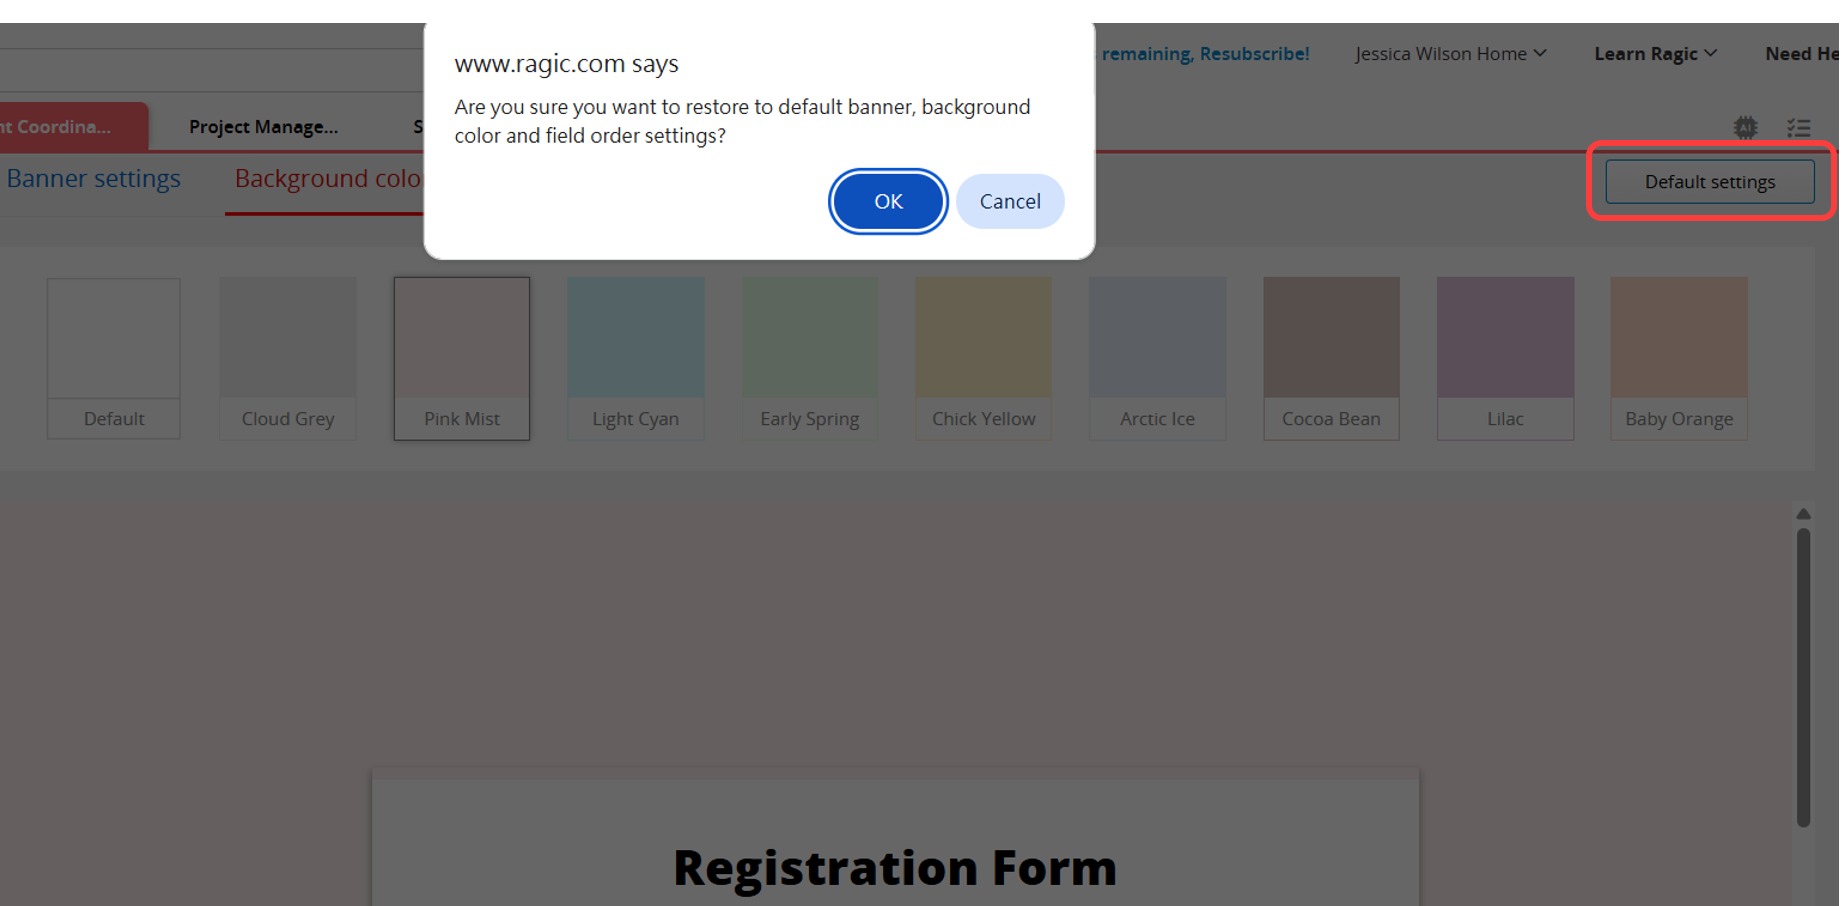
You can apply pre-designed images directly or click Upload Banner to upload your own. The recommended image size is "1500 x 300" pixels.
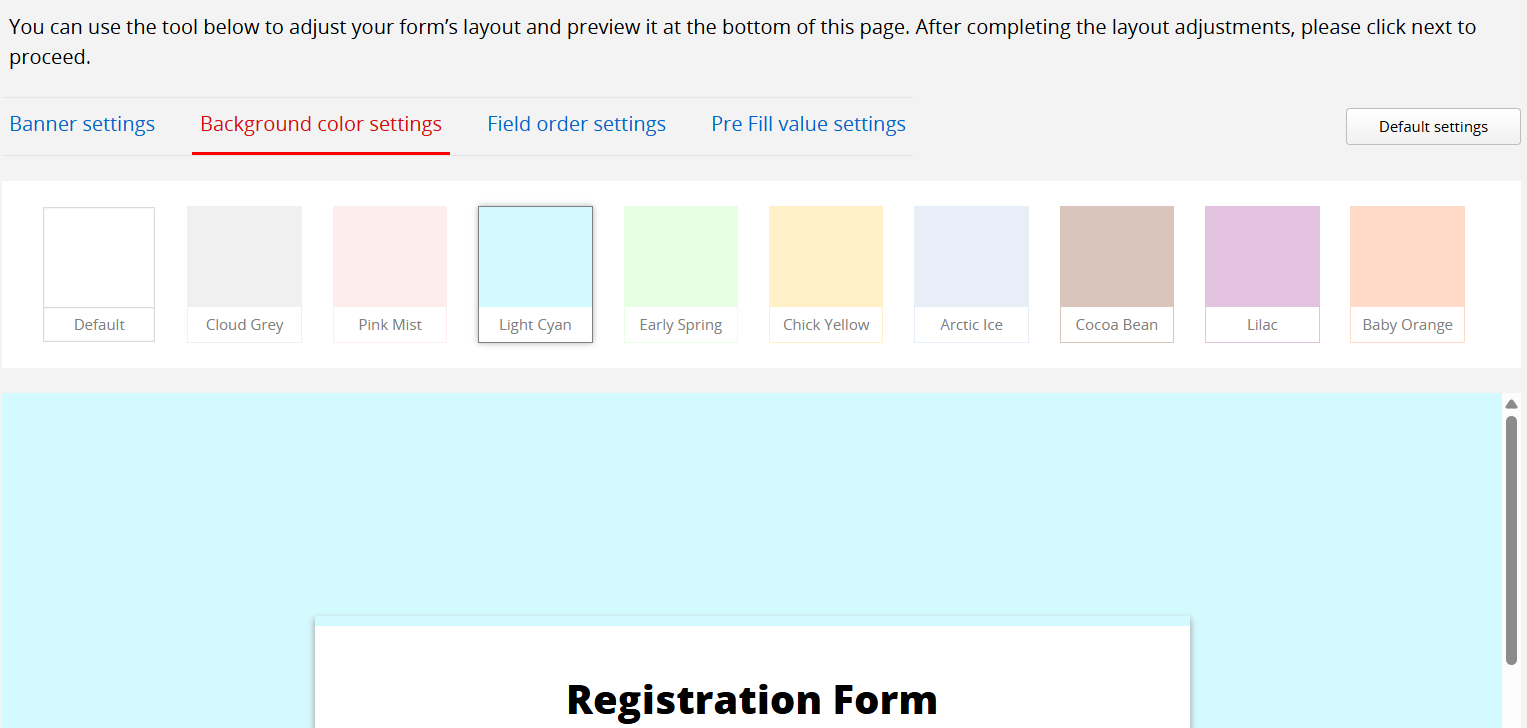
Select the background color for your embedded form.
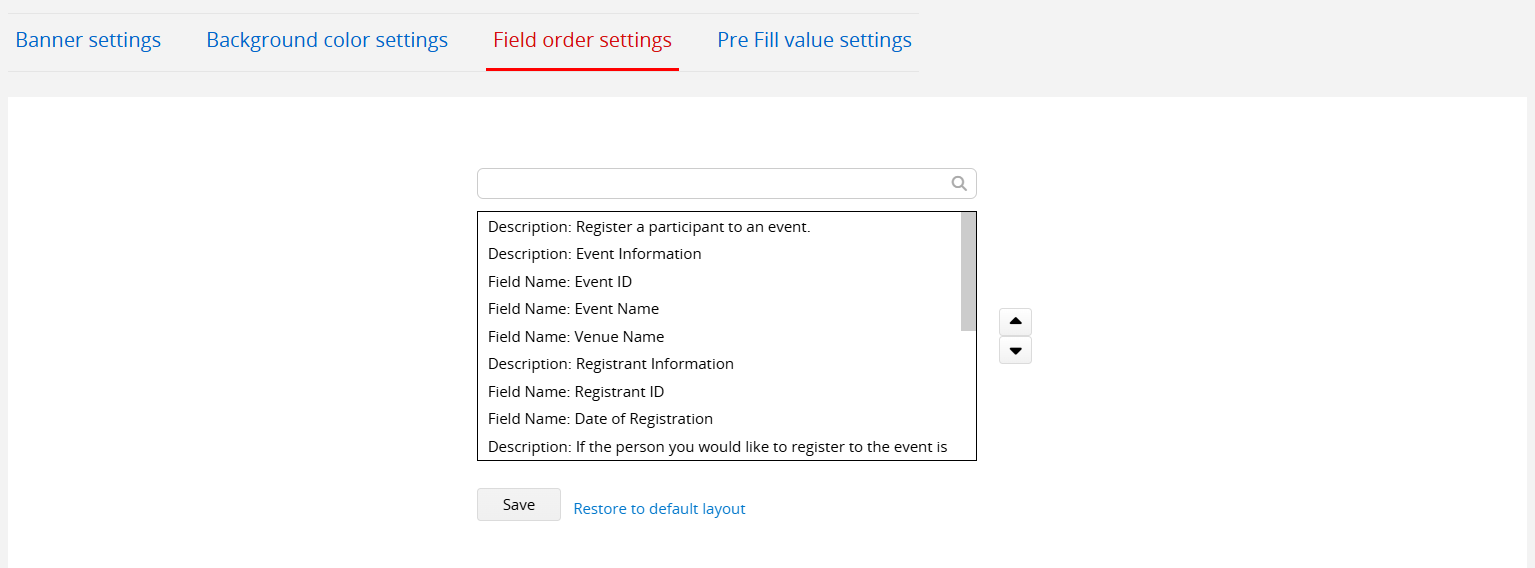
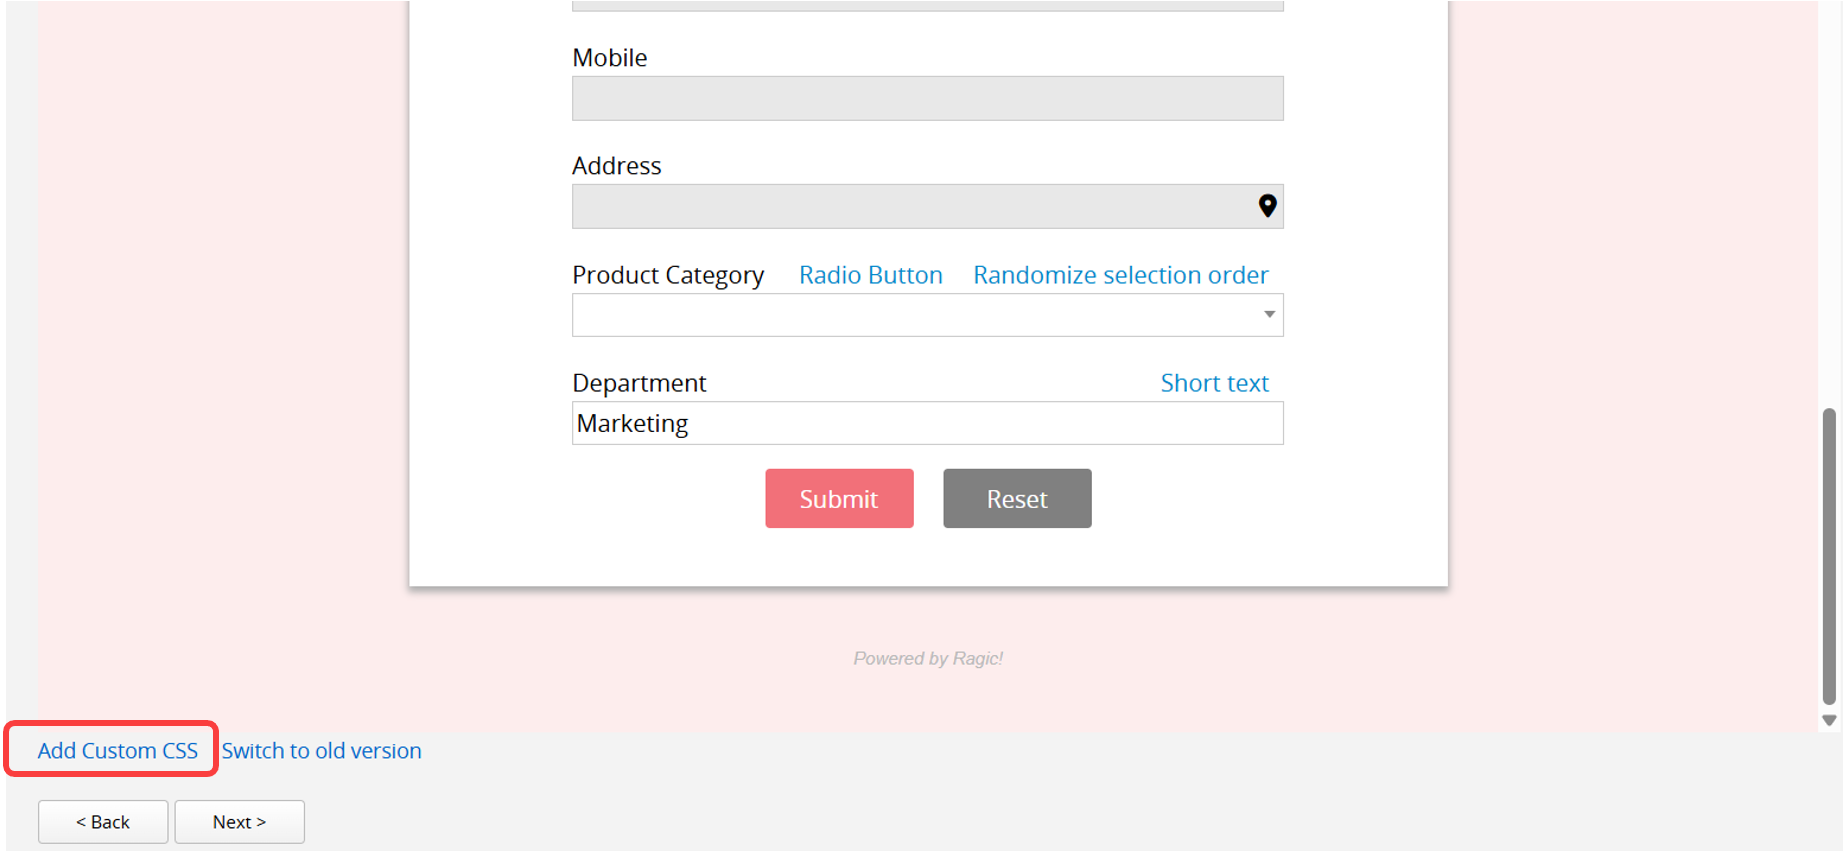
For a better user experience across different devices, the new version of the Database Form uses a single-column layout, similar to the Ragic app. By default, fields are arranged from left to right and top to bottom, but you can manually adjust the order if needed. Click on a field and use the up and down arrows to rearrange it. Remember to click Save to apply the changes.
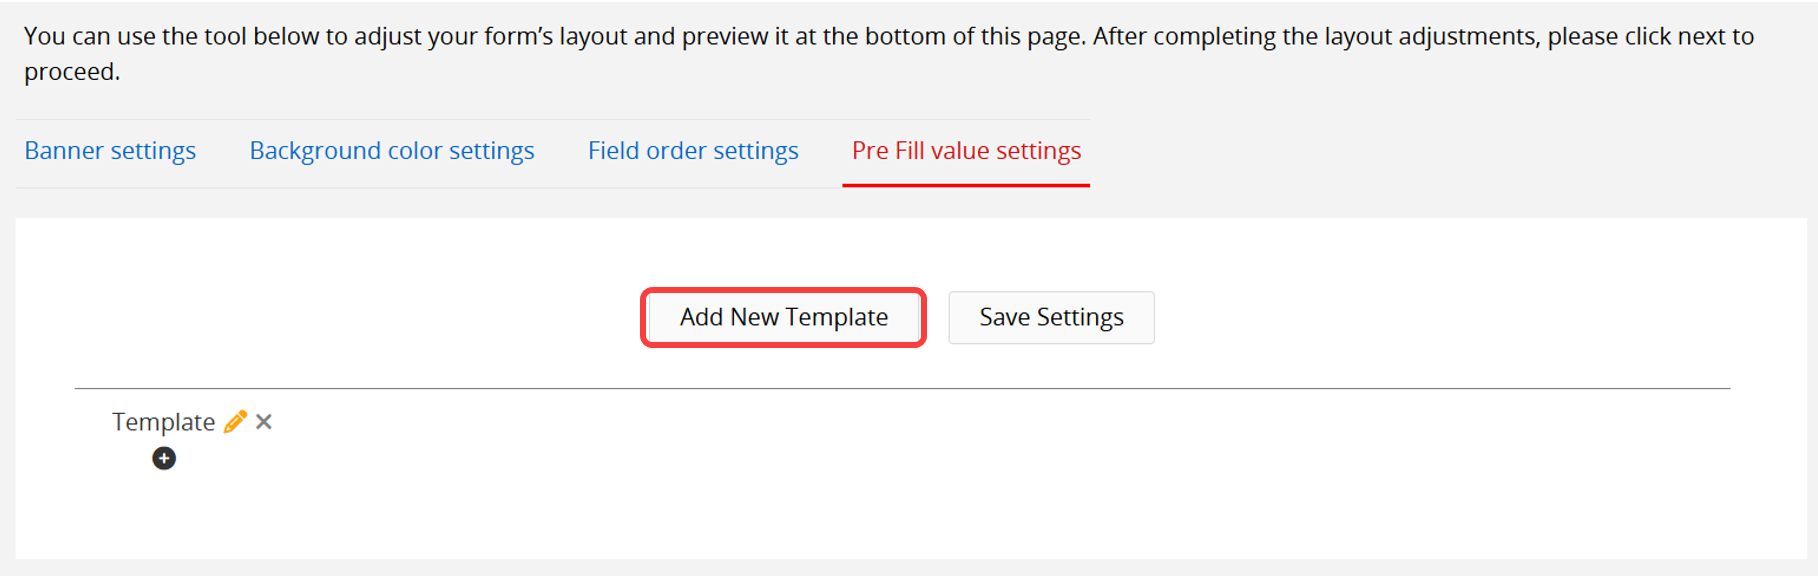
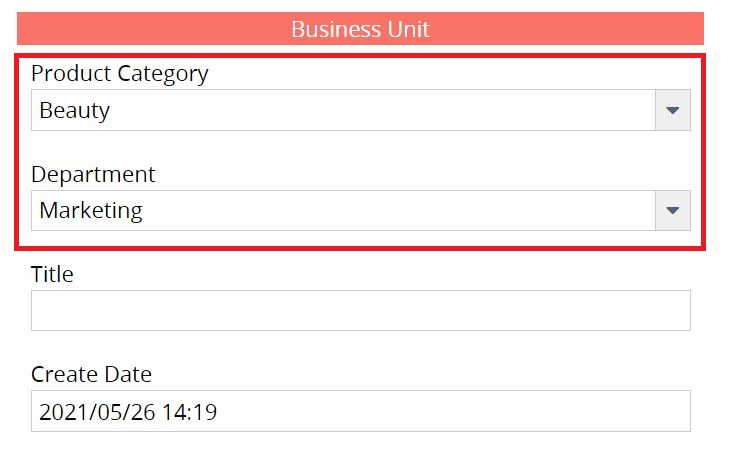
If you want users to auto-fill default values in specific fields, you can use this feature. For example, if you want users from different departments to automatically fill in their corresponding product category and department when signing up for internal training, you can set up Pre Fill Value Templates.
1. Creating a Template
Click Add New Template at the top of the page.
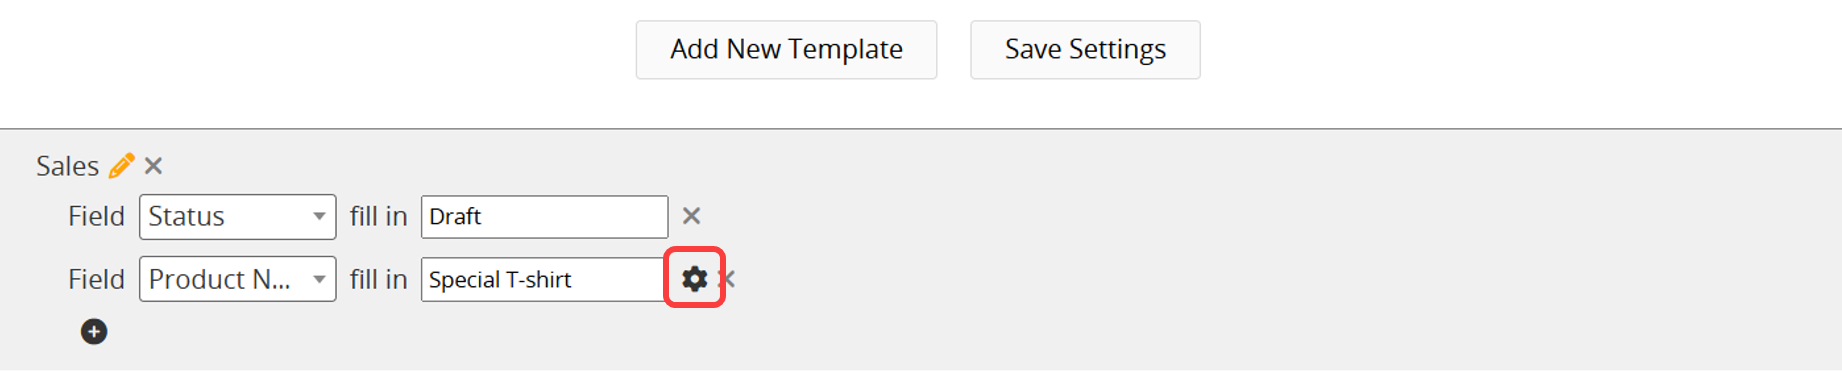
Click the "pencil icon" next to "Template" to edit the template name.

Click the "+" button below to set a pre-filled field and value for the template. Click "+" again to add more fields.

Click "Add New Template" again to create multiple templates for different users to fill out.
When selecting a Subtable field, a "gear" icon will appear on the right side.
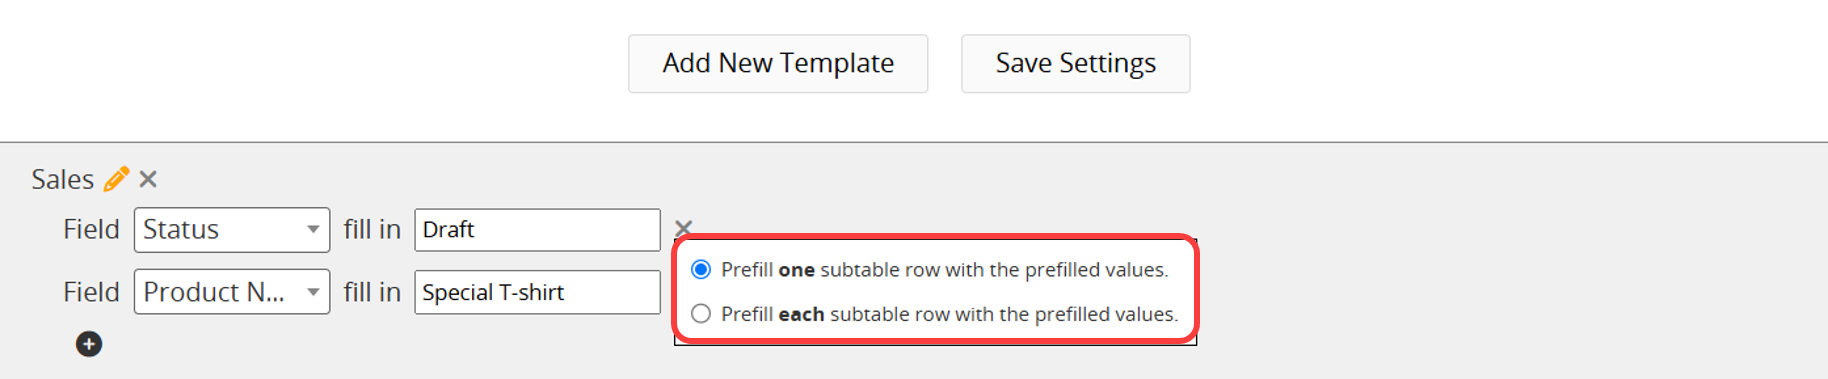
After clicking, you can set the method to prefill values for the Subtable field.
Choosing "Prefill one Subtable row with the values" only prefills the first row, while "Prefill each Subtable row with the values" fills every added row of the Subtable.
2. Selecting a Template
Click the desired template. The background will turn gray, indicating that the template has been selected. After selecting it, click Save Settings to apply the template.
Finally, provide the link that applies the "For Marketing" template to users in the marketing department. When they open the form, the fields "Product Category" and "Department" will already be filled with the values set in the template.
Note: If the template is used infrequently or only for prefilling a few fields in a specific case, you can also add parameters directly to the form URL to set default values. For details, refer to this documentation.
Free Text Field Display Settings
The Free Text field can be set to display as either "Short text" or "Long text." For more extensive content, it can be set to "Long text" for appropriate display.

Selection Field Display Settings
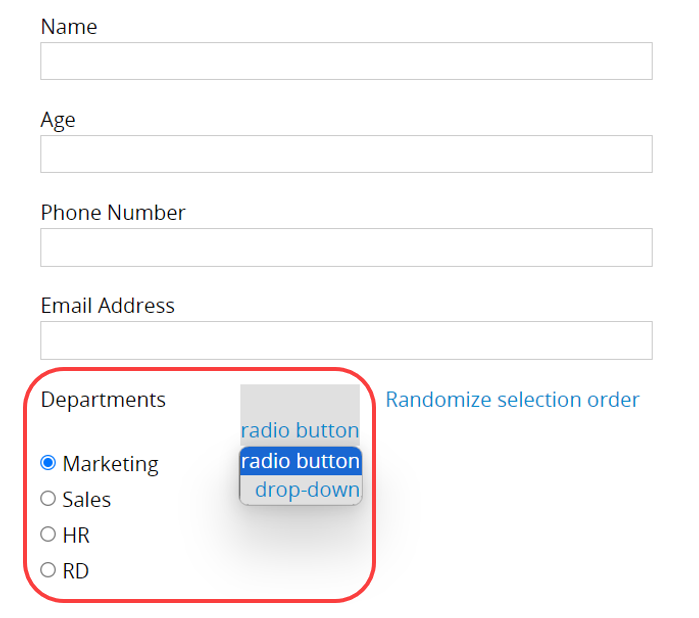
For Selection Fields with fewer than 5 options, you can click "Change Type" below the field in the preview screen to switch the display format from a dropdown menu to radio buttons. However, if there are more than 5 options, or if the Selection field is part of a Subtable or a Cascaded Selection field, only the dropdown menu format will be available.
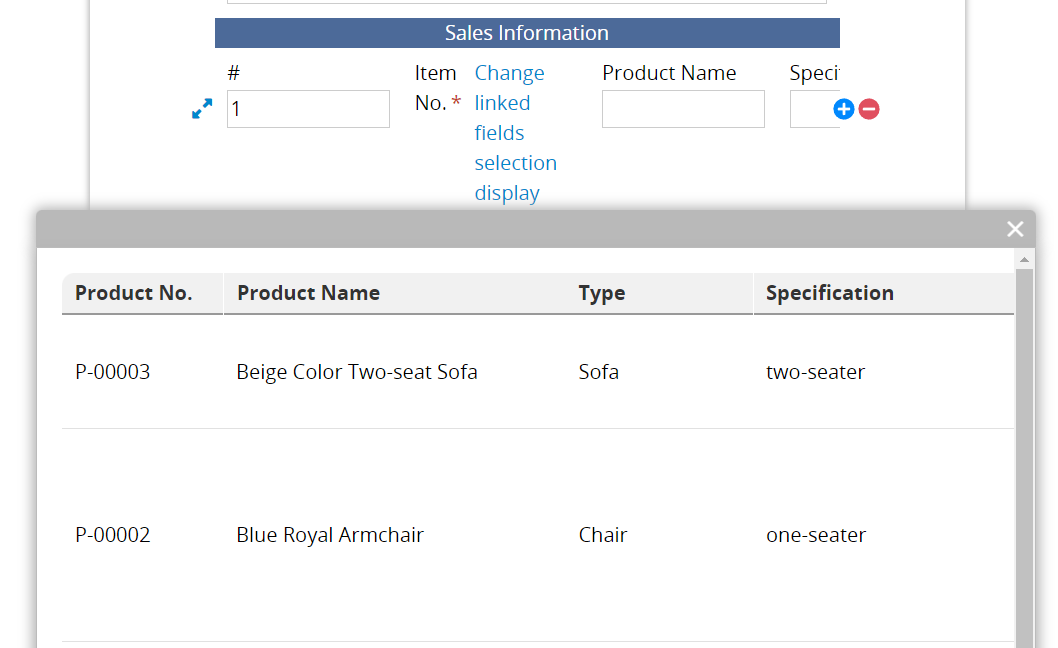
For Select from other sheet fields, you can switch from a dropdown menu to a linked sheet’s Listing Page format. Please note that this will display all fields from the linked sheet’s Listing Page.
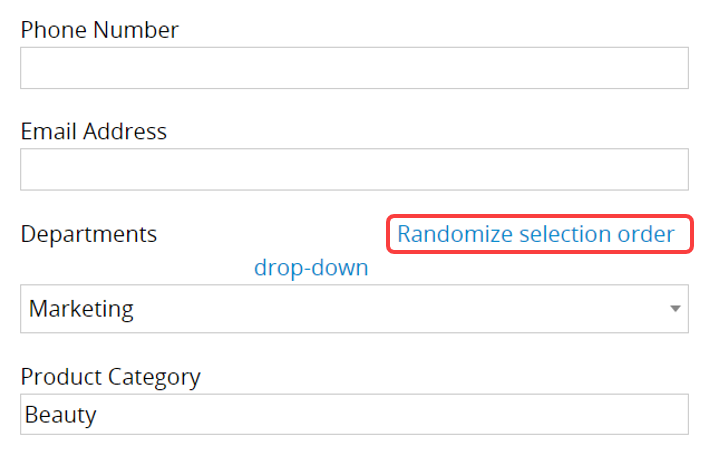
Selection fields can also be set to Randomize selection order.
You can click the Default Settings button in the top right corner to reset the form.
Custom CSS
You may also tune the layout of your embedded forms with custom CSS by clicking on Add Custom CSS in the bottom left corner.
Response Message Settings
After configuring the layout, click Next to set up the message that users will see after they complete the form.
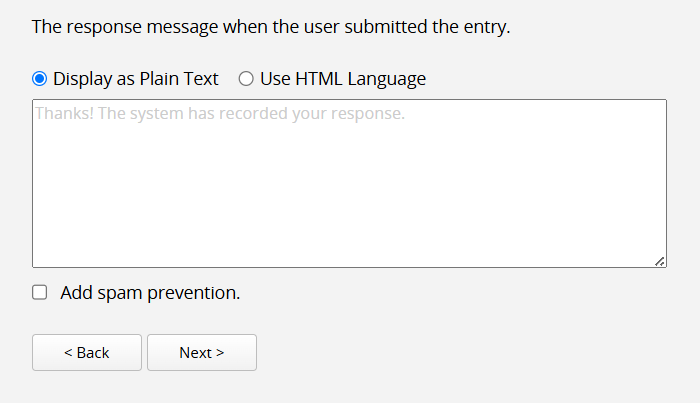
You can choose to display the message as Plain Text or use HTML Language. If you select Display as Plain Text, the message shown after form submission will appear in plain text format. If you select Use HTML Language, you can add HTML syntax in the text box, and the message will display with formatting such as hyperlinks.
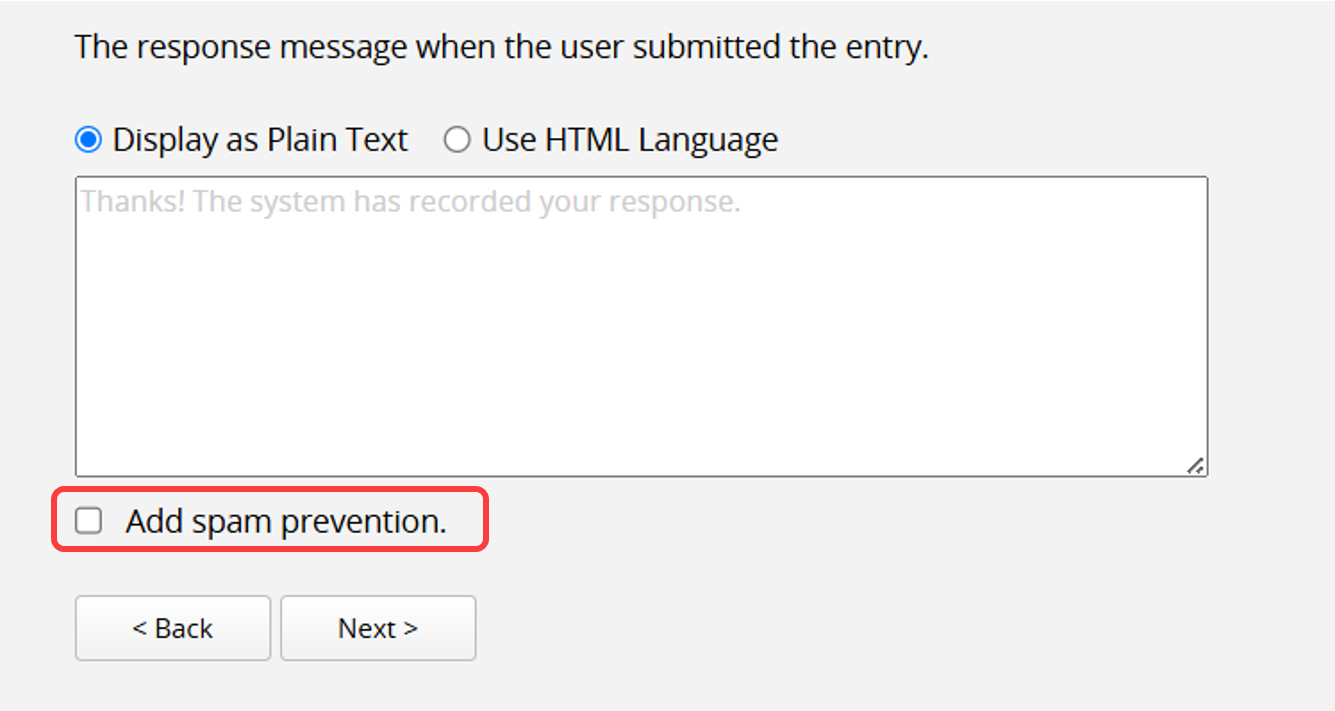
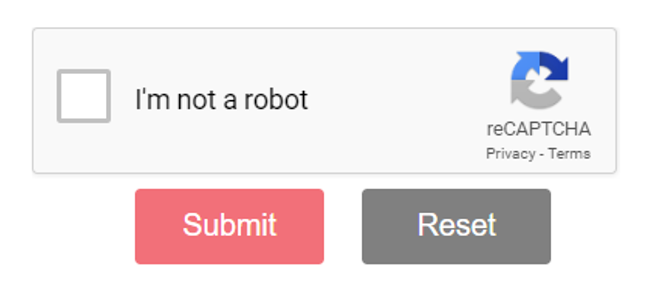
Add Spam Prevention
If you enable Add spam prevention below, users will see a checkbox at the bottom of the embedded form to verify whether they are human.
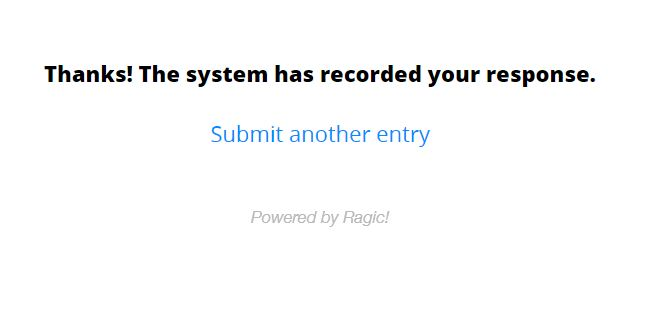
Submit Another Entry Link
If you enable the Display "Submit another entry" link option, a link to submit another entry will be shown after data submission.
Users can use the search engine box to enter keywords and search your database.

The search results will be displayed according to the database viewer layout type you have set. Additionally, users can click on these results to view more detailed information.
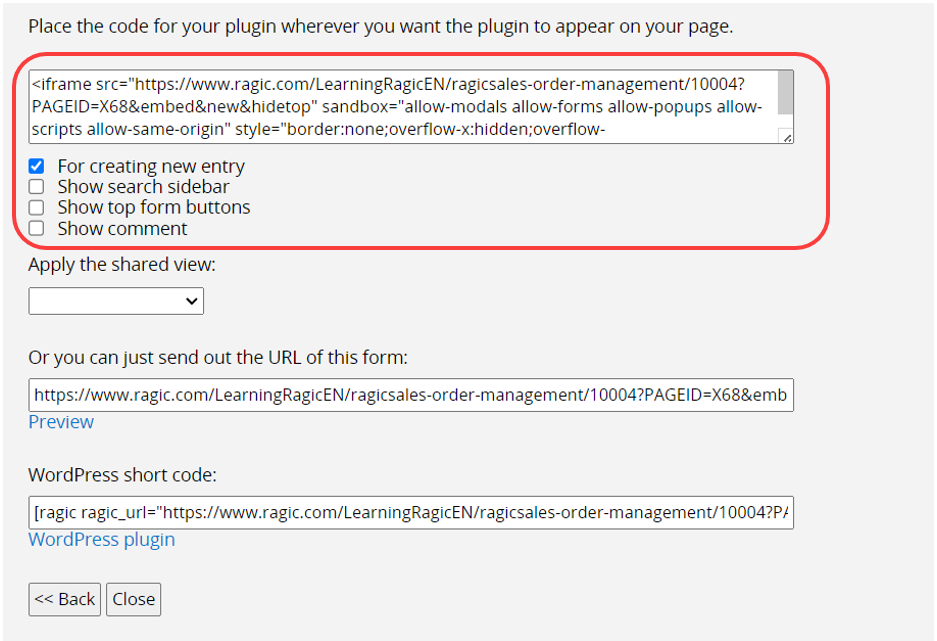
Unlike the other embedding options, Raw Embed allows you to embed the same spreadsheet UI you see on Ragic using an iframe on your website. However, if the sheet is not public, users will need to log in to access it.
You can further configure the following four settings: For creating new entries, Show search sidebar, Show top form buttons, Show comment.
The search icon in the upper right corner can be used for Full Text Search.
The Access Rights for embedded forms are the same as those set for the sheet. Therefore, if you set the sheet to be public, visitors will be able to use it. If the sheet is not set to public, visitors who are not logged in will see a login request screen on your website. (Note: This does not apply to the Database View & Query.)

Database Query Exact Mode and Database View & Query Exact Mode are exceptions where you don’t have to set your sheets as public, and users will still be able to search the data.
 Thank you for your valuable feedback!
