Quick Data Entry Tips: Populating values with formulas

Quick data entry is mostly achieved by automating your tasks, so that you can spend more time working on your business instead of doing data entry. Adding formulas on Ragic proves useful while referring to values in different fields, cutting down time on doing data entry when you fill forms.
Below are some useful tips on using formulas to do quicker data entry:
Concatenating Strings
While entering data, you might find that you have some values that are actually a combination of values from different fields on your database sheet. For instance, a "Full Name" would be a combination of "First Name" and "Last Name", or an "Address" might be a combination of more fields, including the "Street Address", "Postal Code", "City", "State", and "Country".
In such cases, it's usually easier to add a formula to concatenate these values, so that you can set and forget the field. During data entry, the formula would be calculated by Ragic, and would be applied automatically as you're typing into the fields that are the source for the combined values.
In the following example, we're using several fields to populate a customer's title and name, as well as their Full Shipping Address:
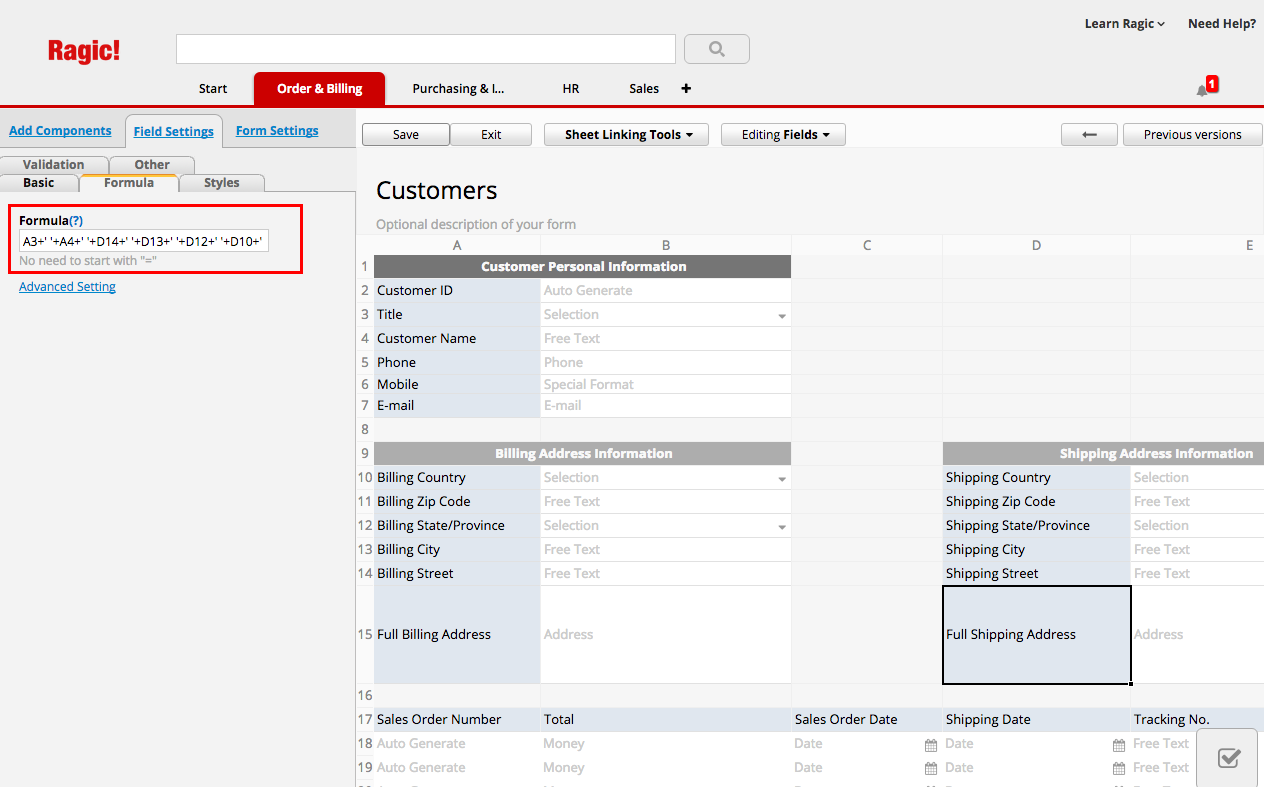
First we want to make sure that we have all the fields that we need to display the information required.

Here we would like to have the field Full Shipping Address to display the title and name of the customer, with the shipping address in the standard postage format. We add the following formula to the field settings to concatenate these fields.
A3+' '+A4+' '+D14+' '+D13+' '+D12+' '+D10+' '+D11
Single quotes and double quotes both work in Ragic for fields that have string values, but it's important to keep consistent with our choice. In the formula above, we're using single quotes to insert a blank space between each field value.
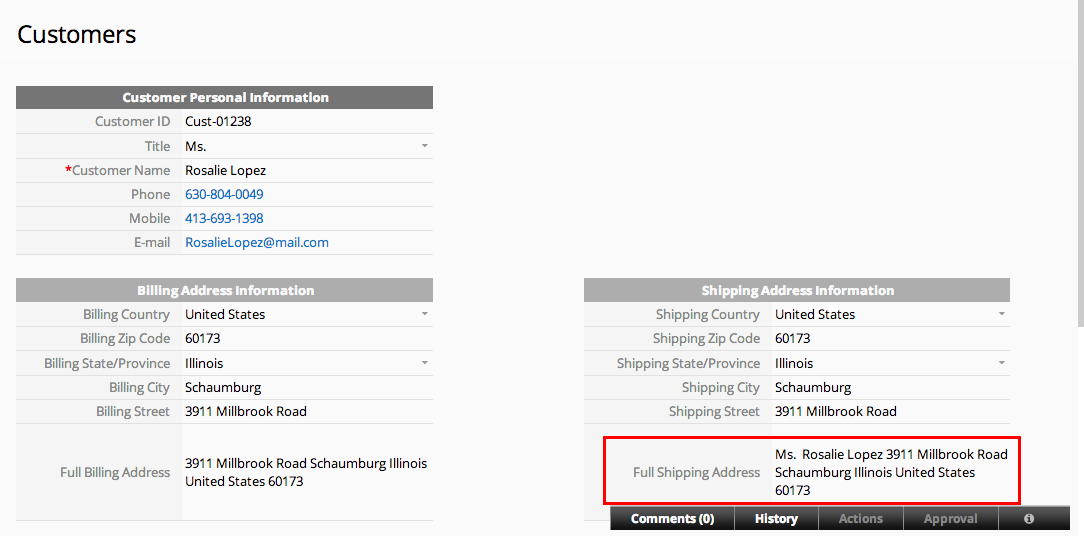
Now that the Full Shipping Address displays, we can use the information from this field when we only need the full address information, for example when printing labels for shipping.
Referring to other fields with conditional formulas
Conditional formulas are a great way to refer to different fields. This is especially useful if you would like to automatically reflect what the value of these fields mean by editing a value in another field. For example, a simple "Yes" or "No" question might be a check to see if a Billing Address is going to be the same with a Shipping Address value. Based on what is selected in this field, you can configure the values for the Billing Address. The conditions that we are setting can be as simplistic or complicated as we want, depending on what is necessary for our data entry.
Remember, when used on free text or selection fields that contain strings .RAW is required to be added to the referenced field name, while this is not needed when used to reference a numeric field.
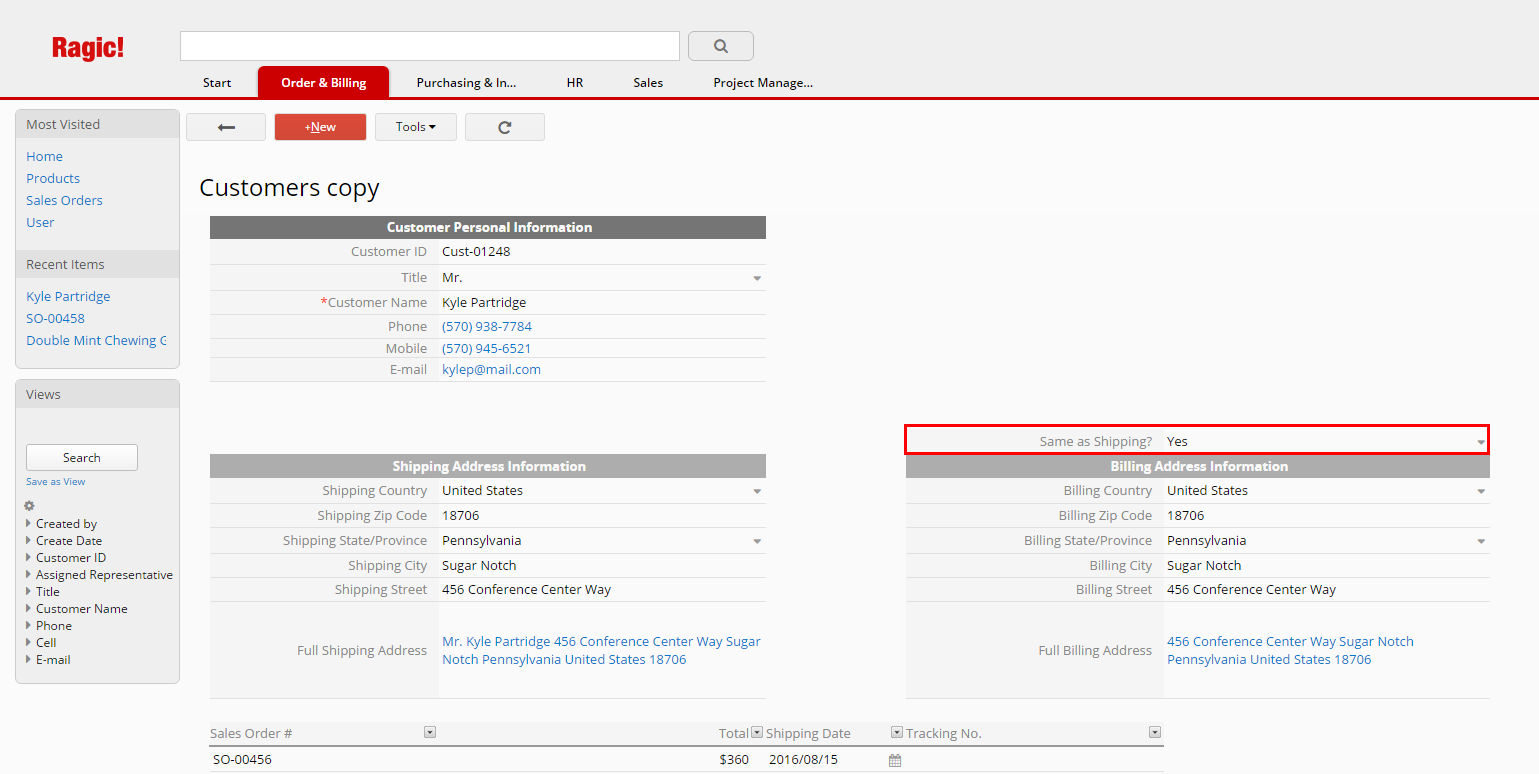
In the example below, we're going to populate a customer's Billing Address from their Shipping Address if a selection field has the "Yes" option selected. Otherwise, the Billing Address would not be populated, in cases where the selection field is either blank, or the "No" option is selected.
First, we set up a Selection Field in D10, with the title "Same as Shipping?", and the options "Yes" and "No". Using the UPDATEIF formula, we refer to this field, and set the condition to update the Billing Street field if the "Yes" option is set. The result in our formula is set as A16, which is the Shipping Street field.
We're using the formula
UPDATEIF(D10.RAW="Yes",A16)
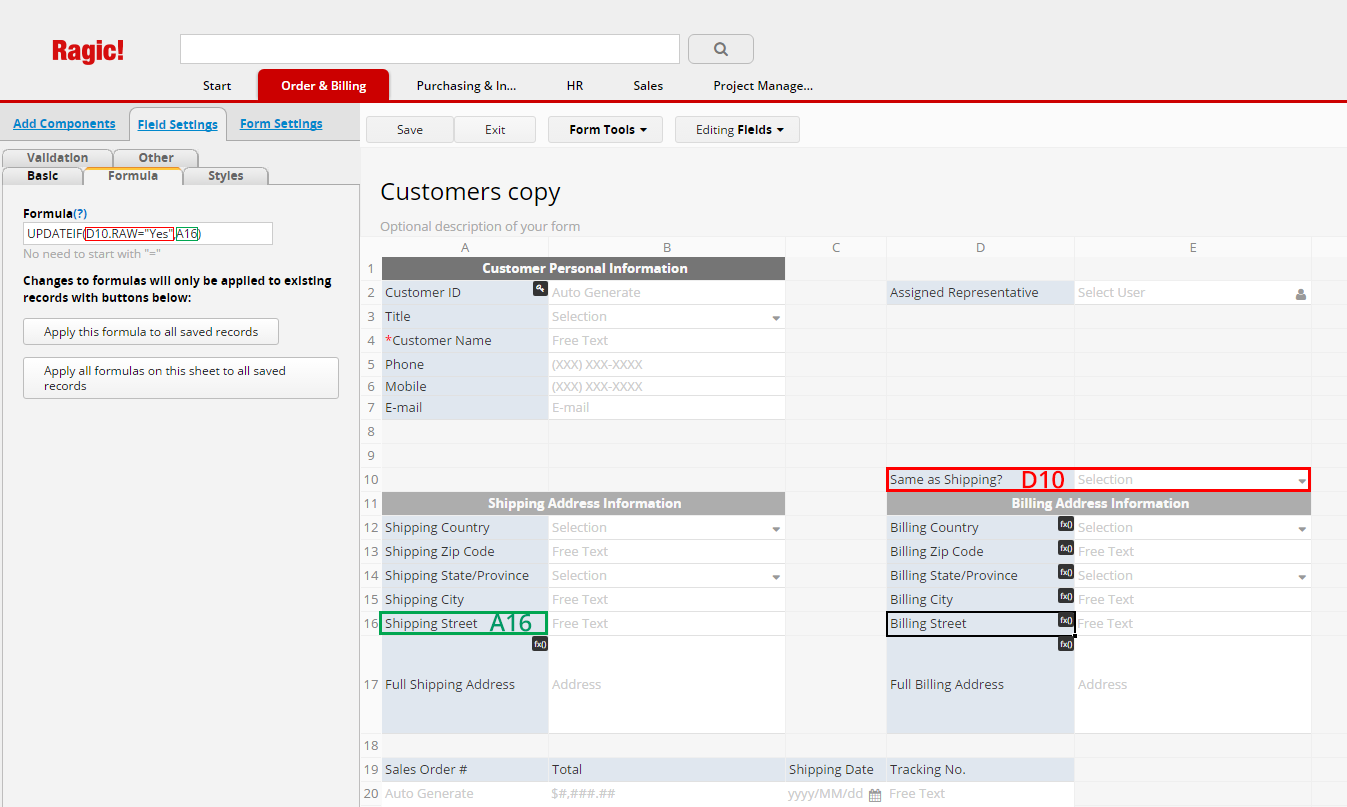
This formula can be set for several fields, which will result in the entire Billing Address section in our form to be automatically filled with the values from the Shipping Address section.
Author's note: This is part 3 of my blog series, Quick Data Entry Tips. Click here for part 2, creating a Traffic Light Status Indicator, and here for part 4, better form design.
Category: Talking Ragic > Learn Ragic


